Shades
Shading can be modelled in various ways using the Tas Engineering package:
Using Feature Shades in the Building Simulator
Using Shades in the 3D modeller
Importing shade surfaces from 3D DWGs
Modelling shading from other geometry
This section concerns Shades in the 3D modeller.
Creating Shades
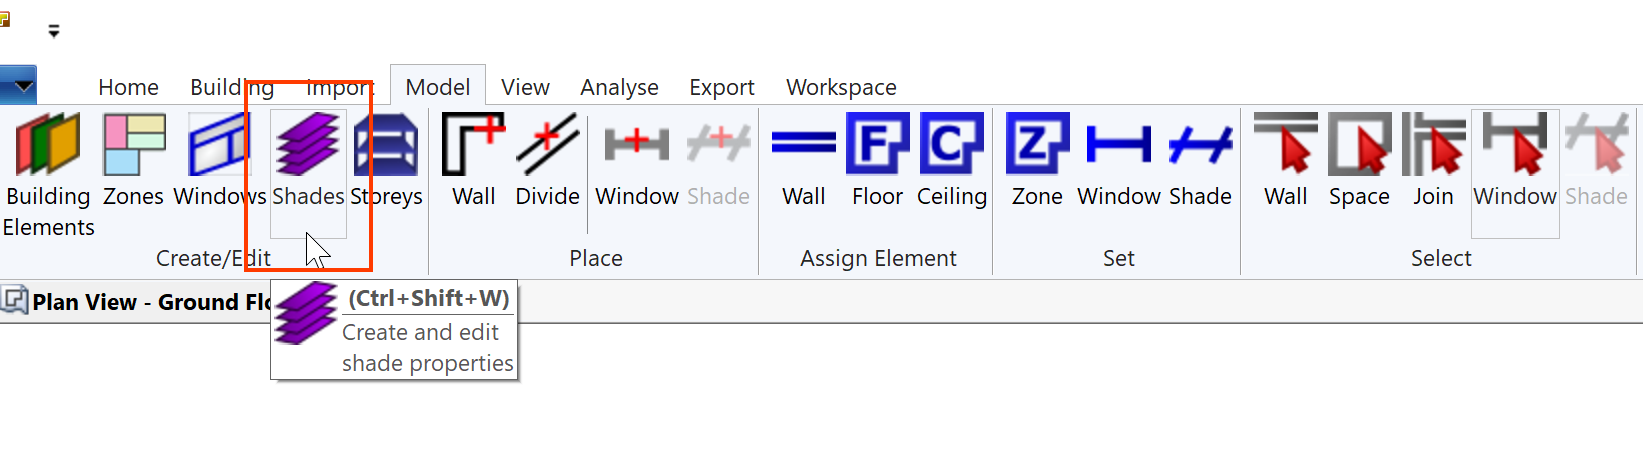
Shades can be created in the 3D model by going to model >> create/edit >> shades in the ribbon:
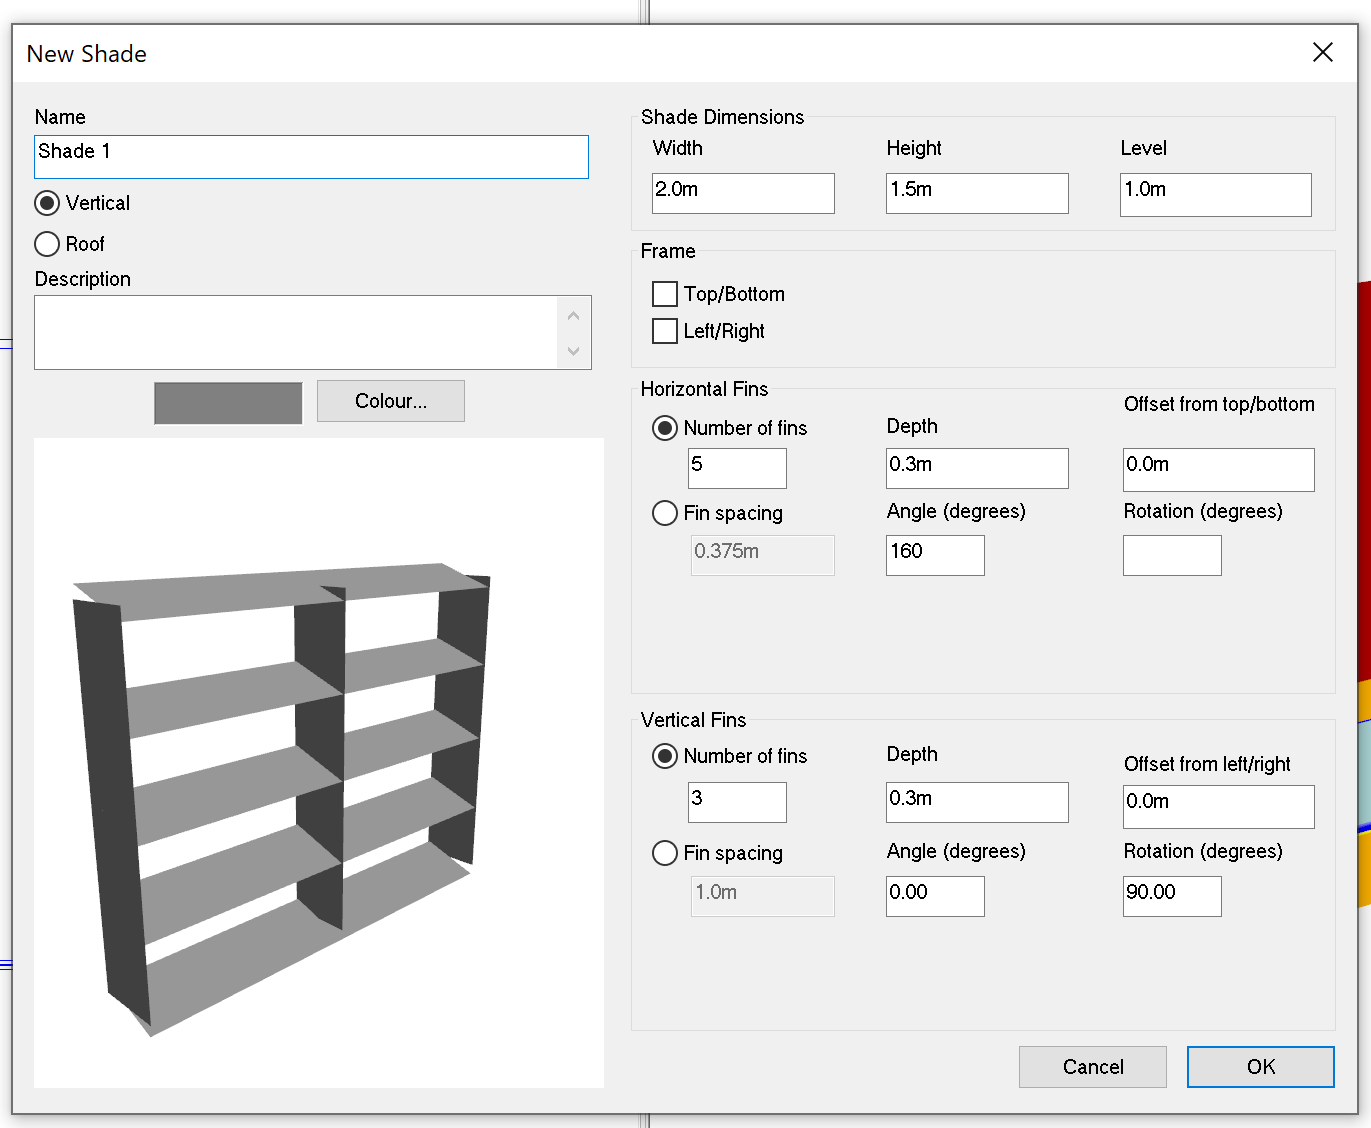
This will open the Create Shades dialog. Click New Shade to create one:
Note
Vertical shades can only be placed inside null walls.
Shade Dimensions
The shade dimensions allow you to alter the width and the height of the shade in the same way as windows.
As with windows, the Level corresponds to the vertical position above the current Storey at which the shade will be placed within the null wall.
Frame
Like windows, shades can have an optional frame. In the Building Simulator, this will appear as a Building Element associated with the shade surface in the Zone.
The name of the Building Element will be of the format: “[shade name] - frame”
Horizontal & Vertical fins
When creating horizontal and vertical fins, you can decide to specify either the Number of Fins or the Fin Spacing.
If you specify the Number of Fins, the spacing will be automatically calculated as the width of the shade / the number of fins.
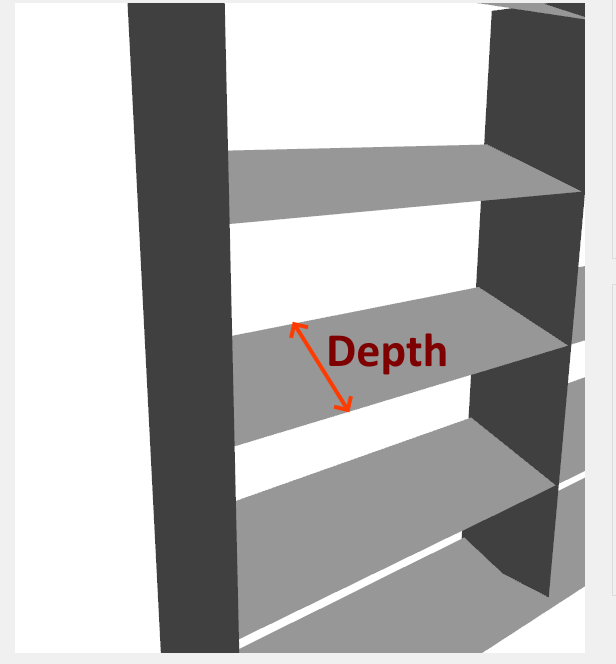
The depth of the fins is, in essence, their size:
The Offset from top/bottom allows you to spread or compress the shades along the vertical axis:
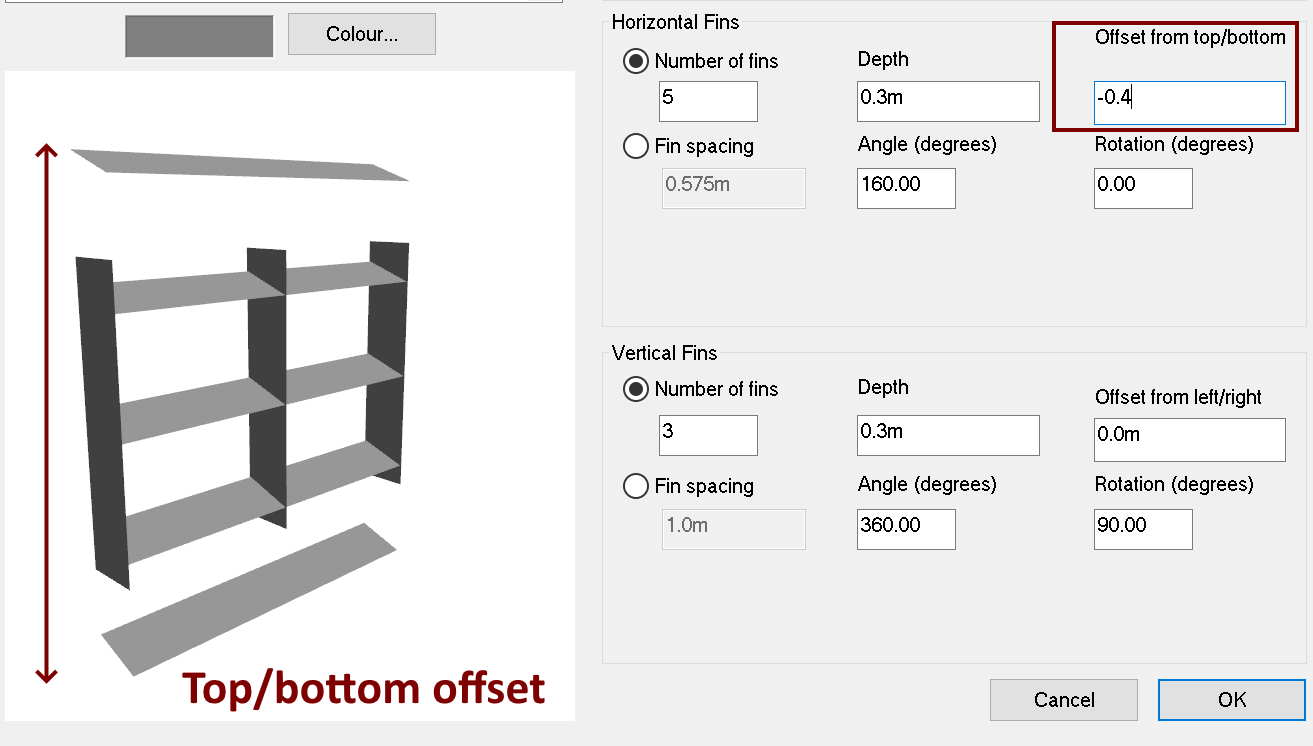
This value can be positive or negative.
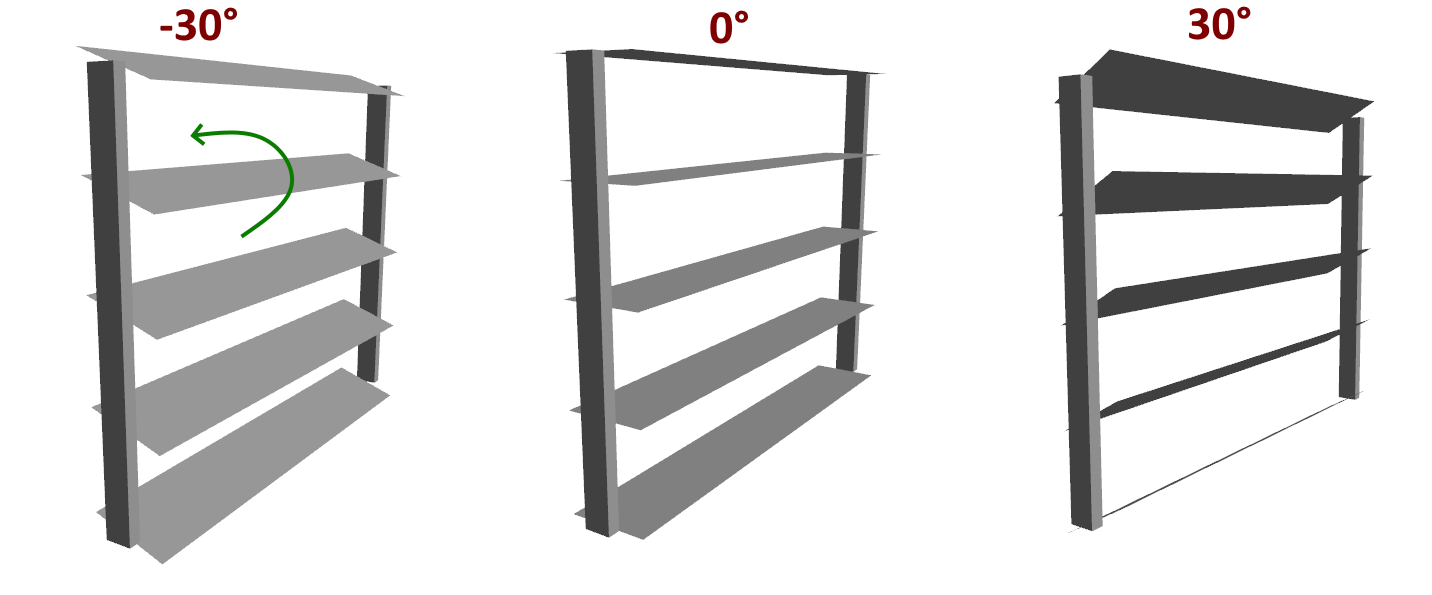
The Angle relates to to the rotation around the fins plane:
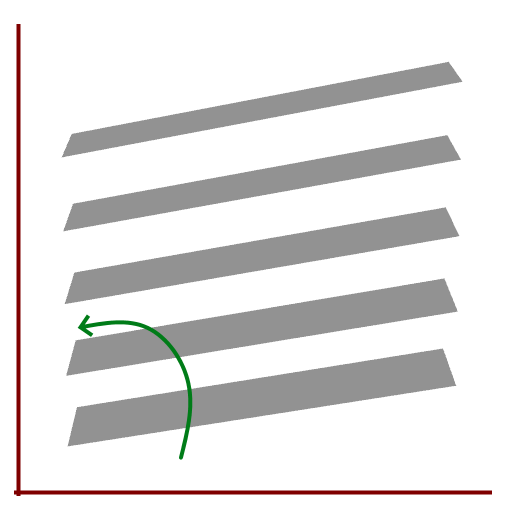
The Rotation relates to the rotation along the plane of the wall to which the shade will be applied:
Similar properties apply to the vertical fins; you can change the options and see the effects in the preview window if you are unsure what a property does.
When you apply a Rotation to a shade, the Adjust width/vertical fins for alignment option appears. This extends the length of the shade to meet the desired width:
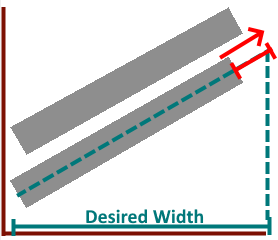
This is is sometimes desireable, as rotating the shade fin means it may not extend far enough. This may be easier to visualise when using a frame.
Placing Shades
Vertical Shades
Vertical shades can only be placed in null walls.
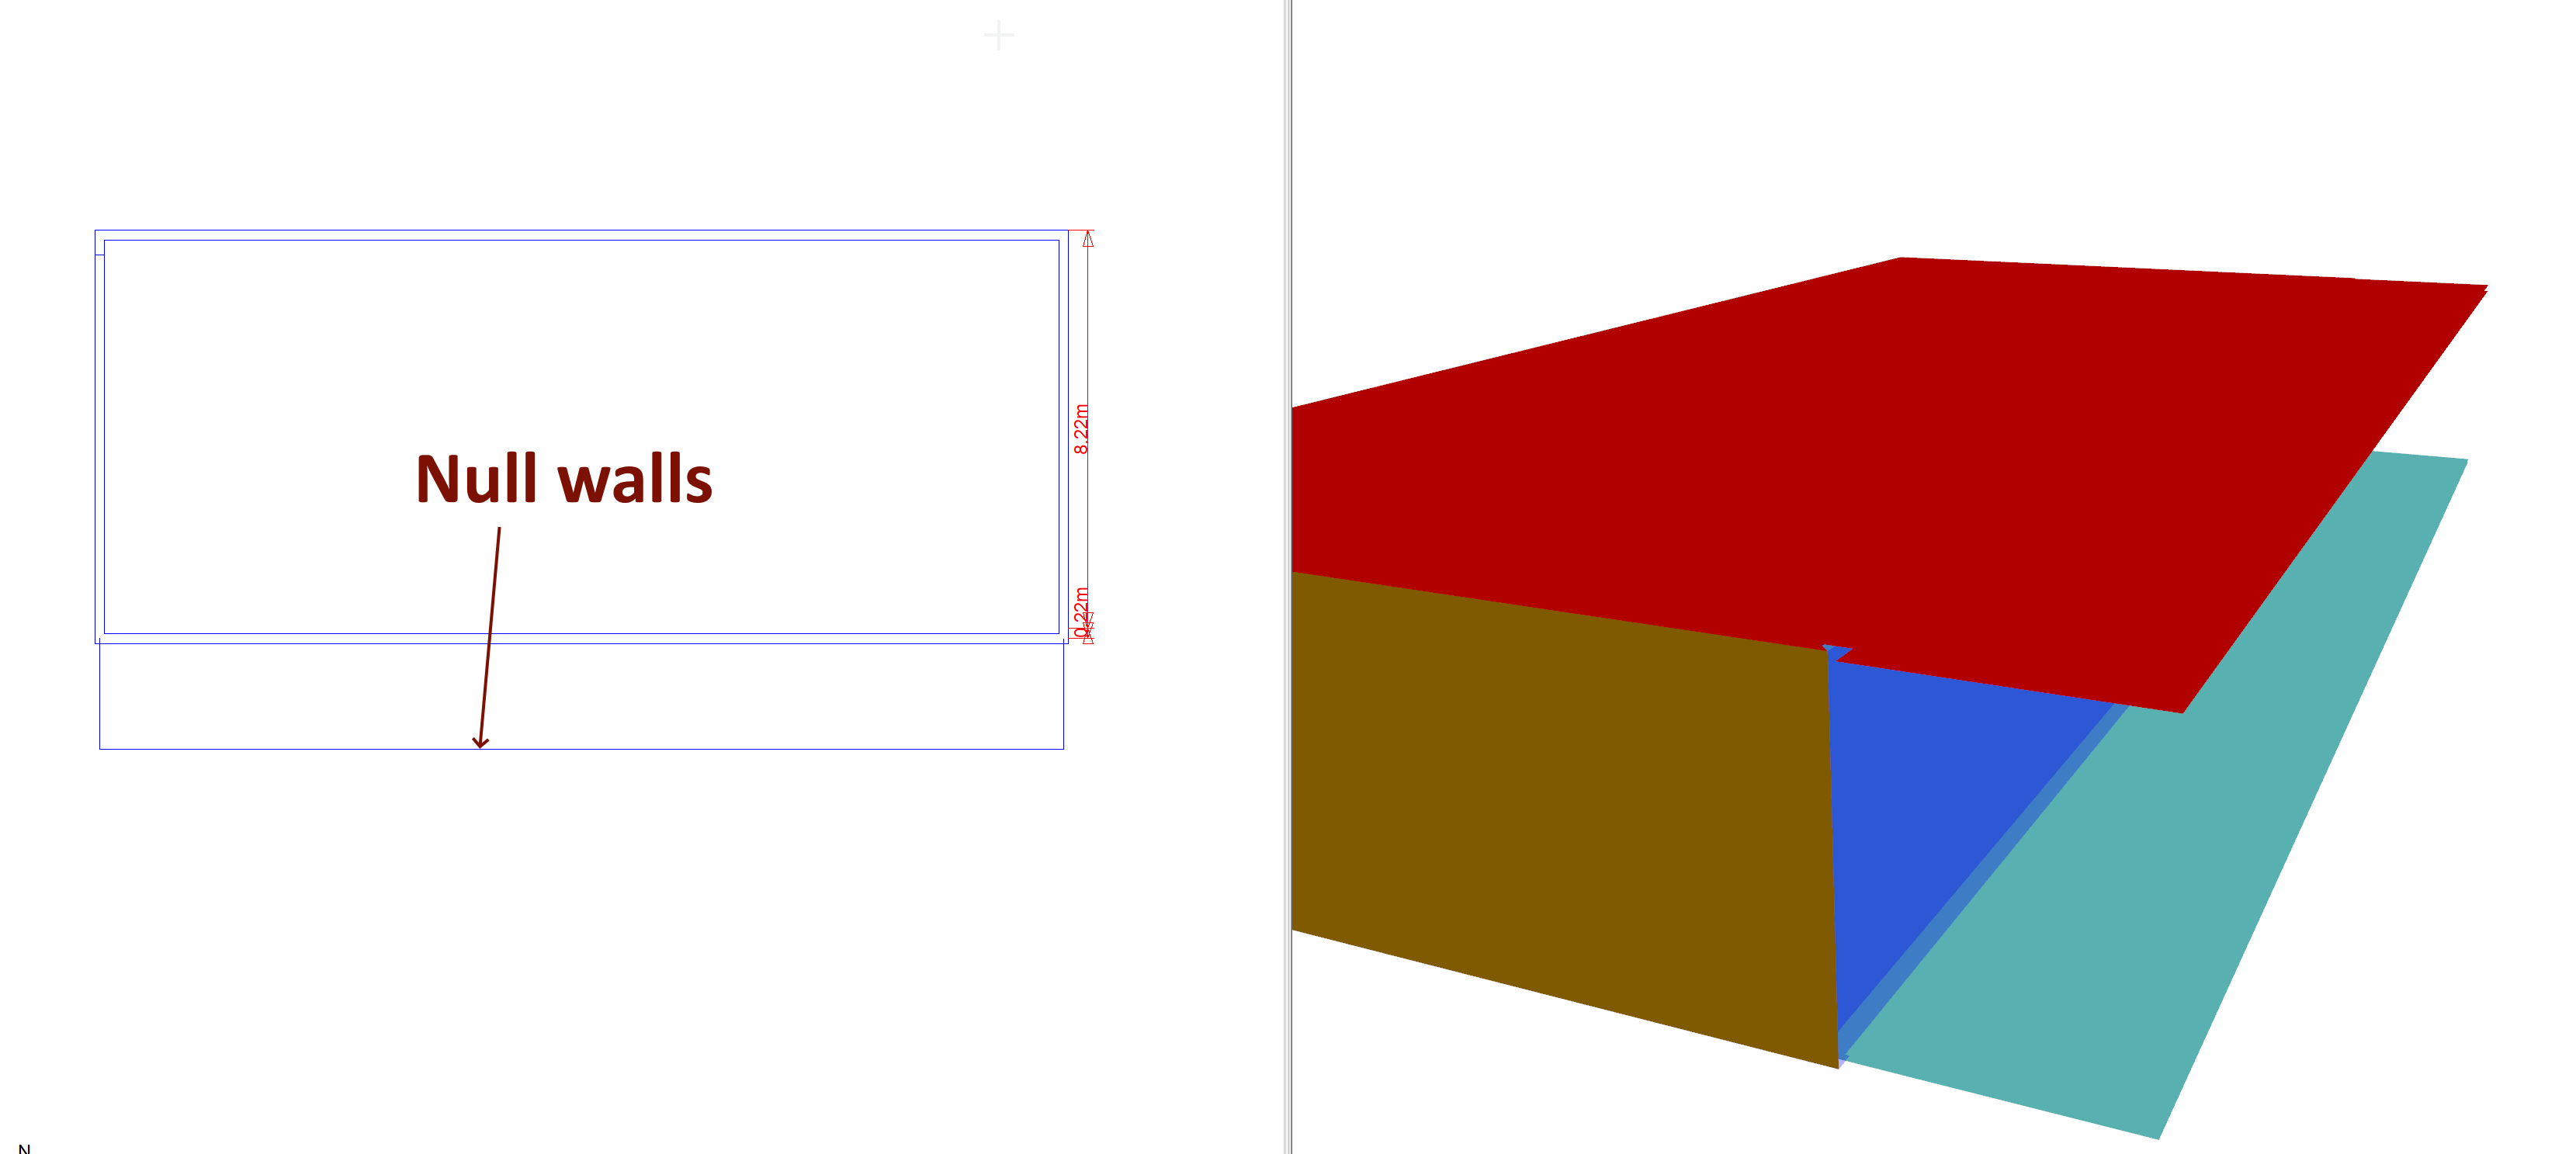
To add a shade to a window, first draw a null wall attached to the facade surrounding the window:
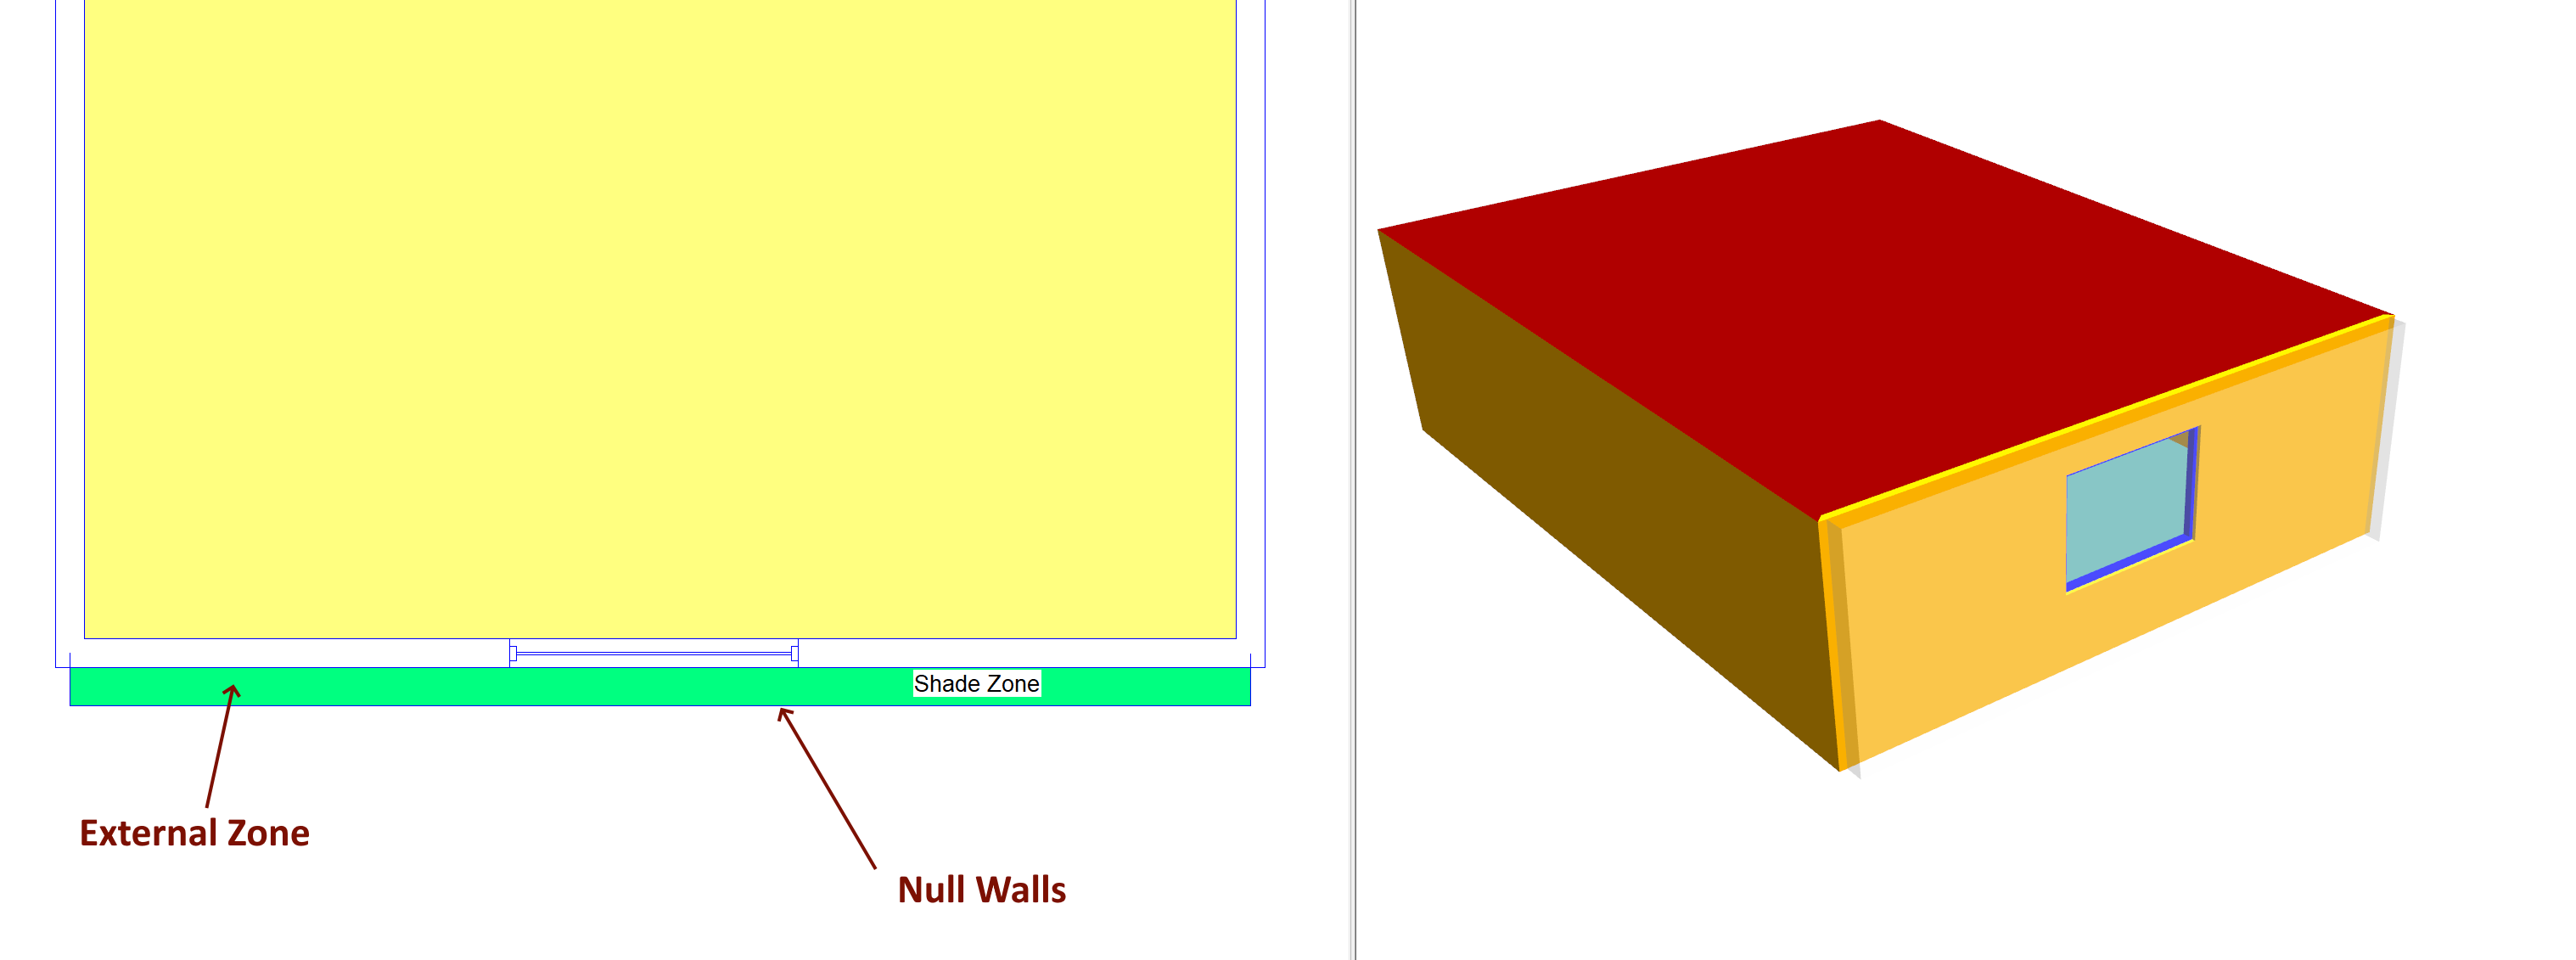
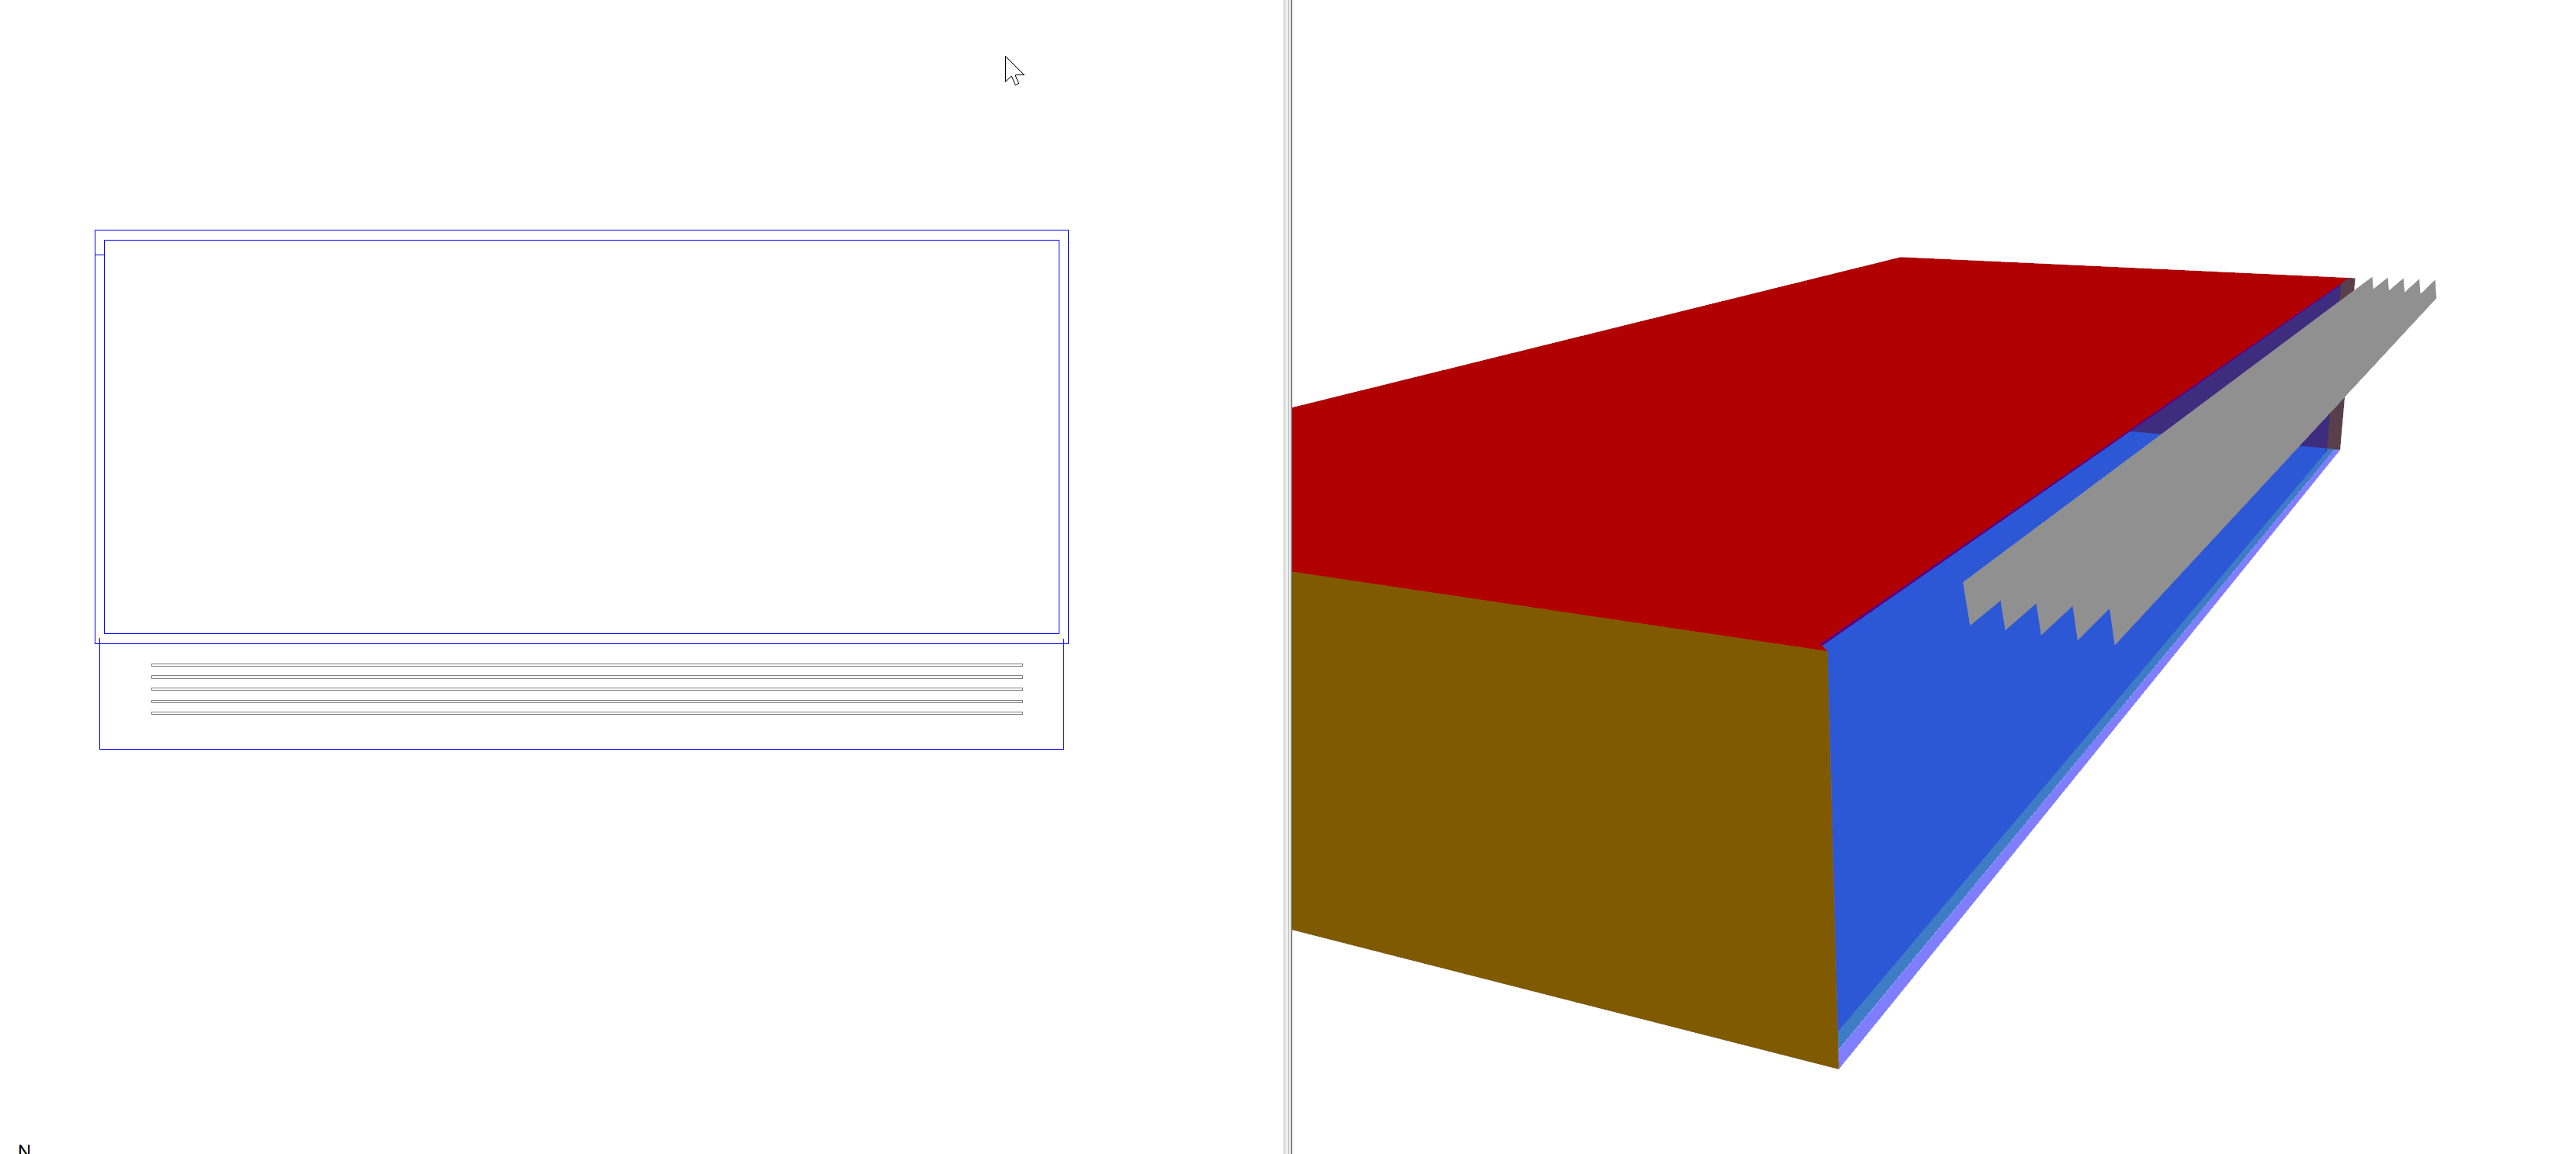
The space can be assigned an External Zone and should have a Null Floor and Null Ceiling element.
Note
Assigning an external zone to a space containing a shade will account for diffuse shading effects during the shading calculations. If an external zone is not used, only the direct shading will be accounted for.
You can now use the Place Shade tool (model >> create/edit >> place shade) to position the shade on the null wall:
You can optionally use the select wall tool to adjust the position of the shade and move it closer to the window:
Brise Soliels
Horizontal shades can be used to model rooflights & brise soleils.
Horizontal shades must be placed in null ceilings/floors.
To model a brise soleil:
Create a space outside the building using null walls
Set the floor element to Null and the ceiling element to Null
Use the Place Shade tool in the 2D plan view
You can optionally add assign an external zone to the space, if you wish to take into consideration diffuse shading. If you do not add an external zone to the space, only direct shading will be accounted for.
Draw the space with nulls:
Set the floor & ceiling elements to null:

Add the shade:
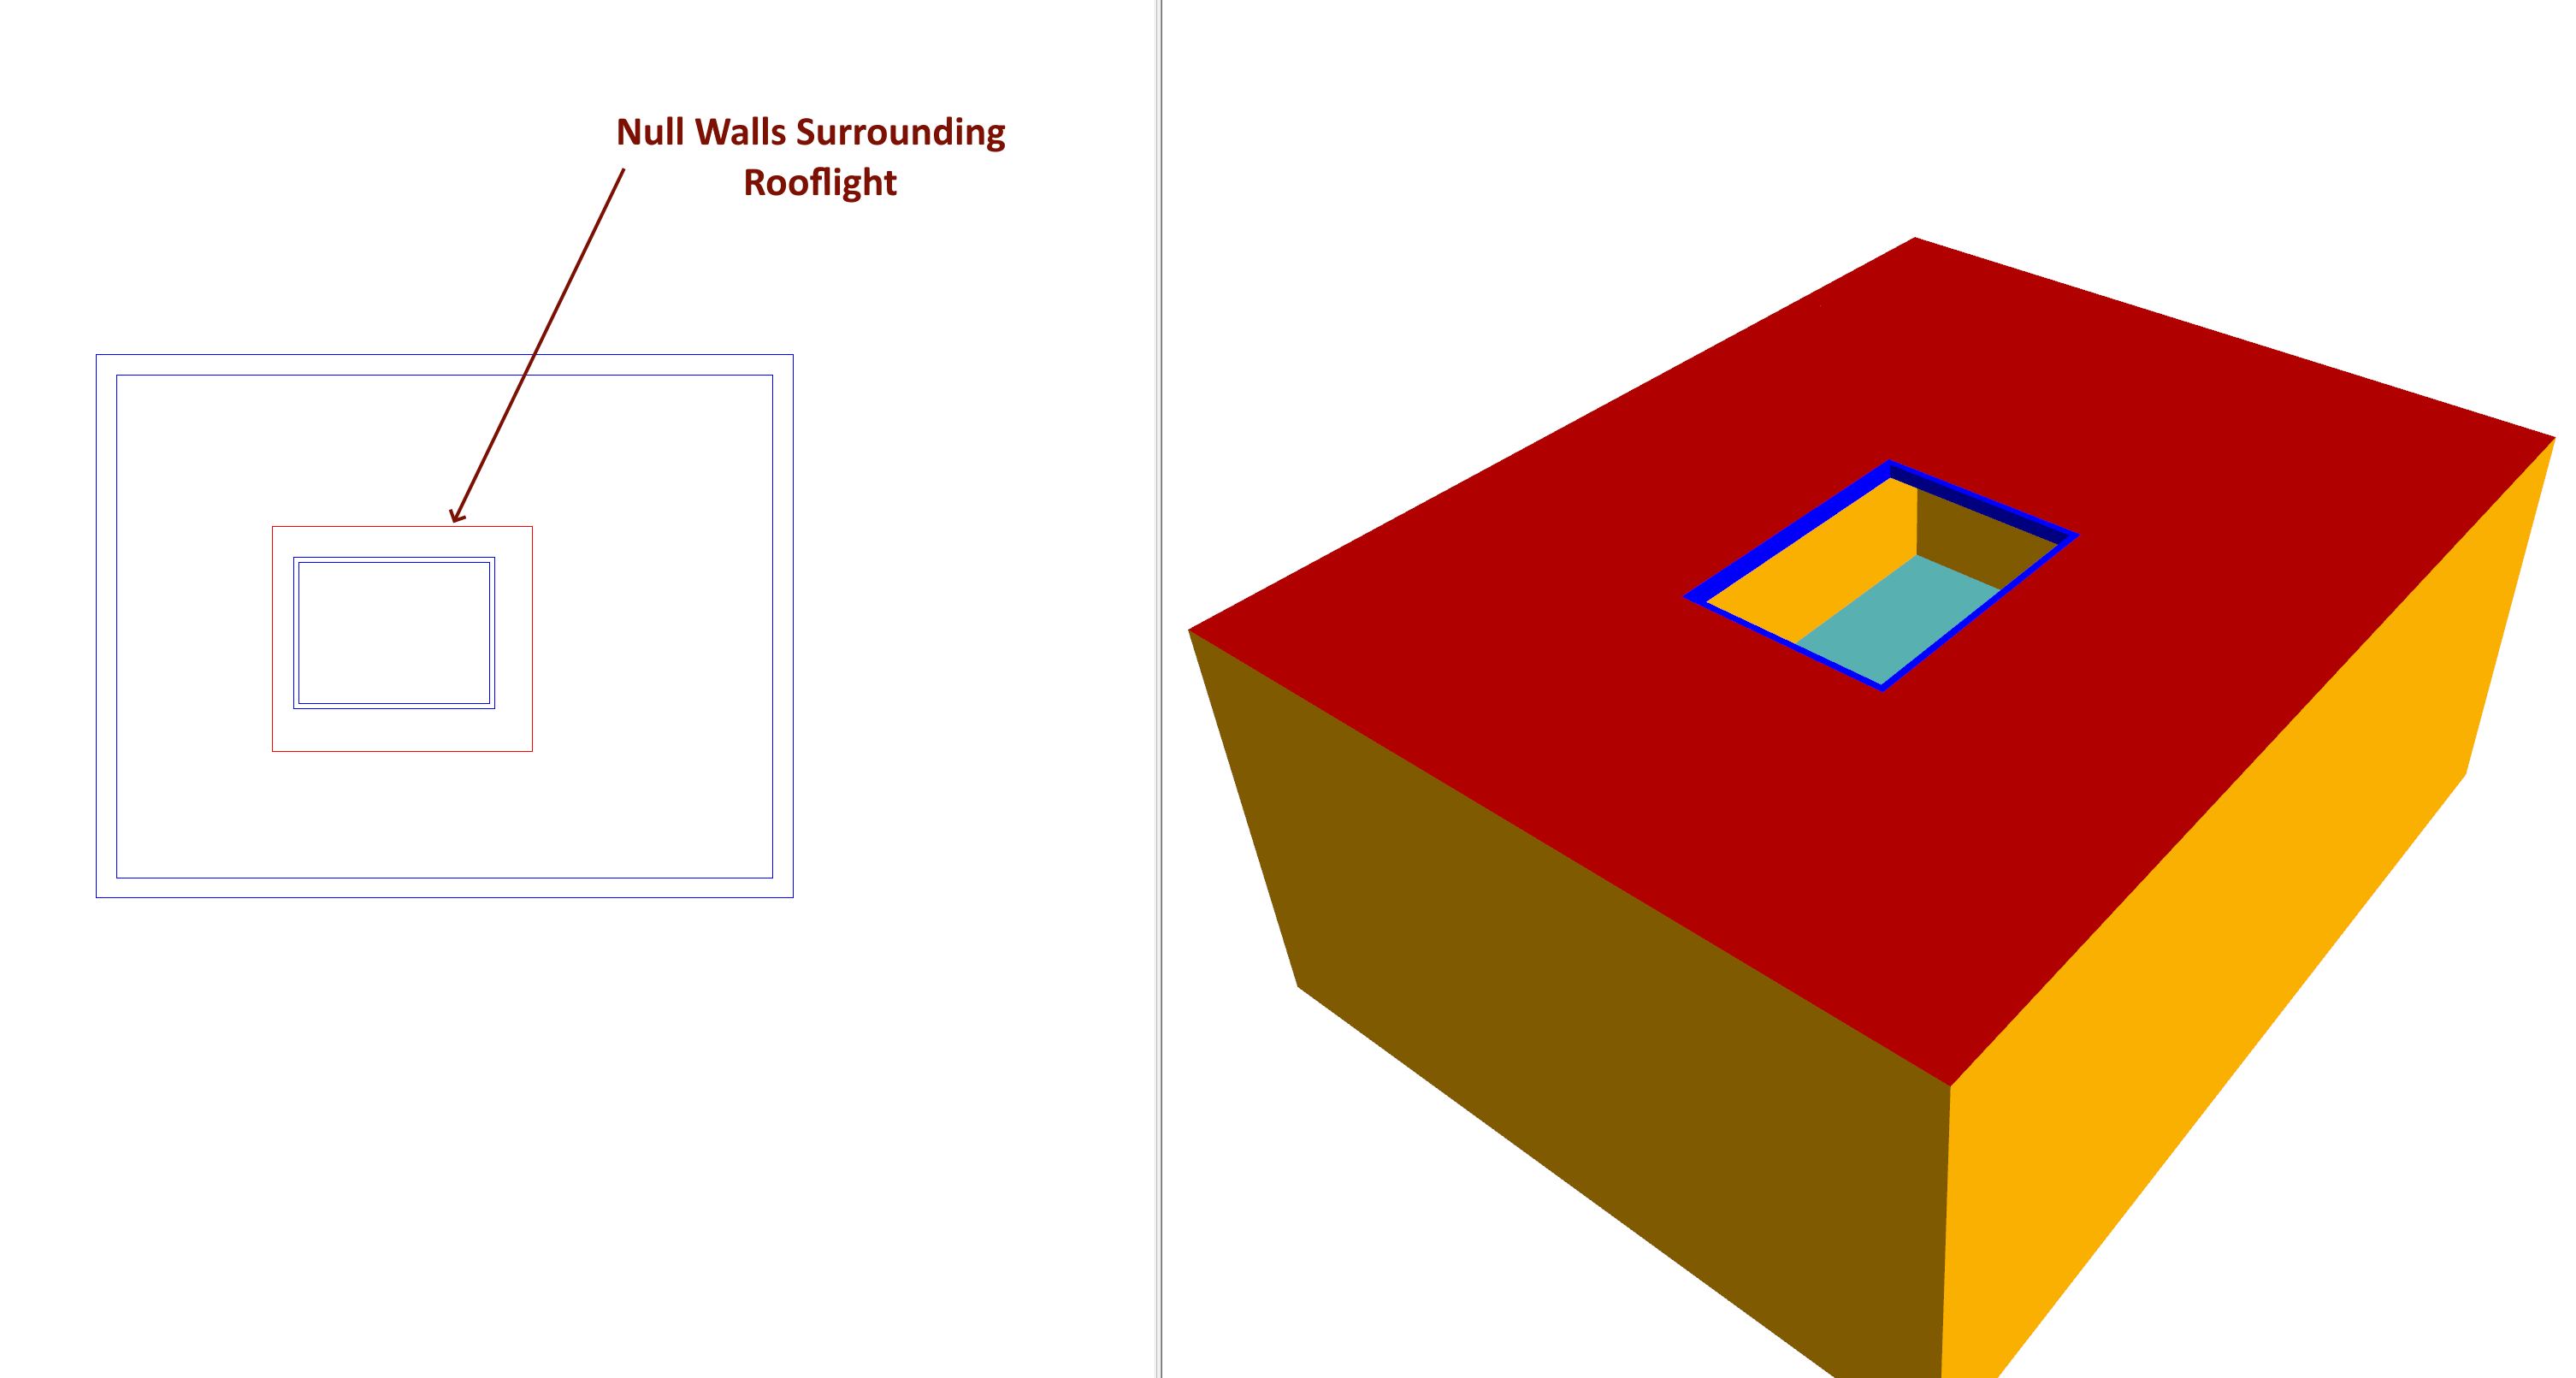
Rooflight Shades
Adding shades to rooflights involves:
Surrounding adding a space comprised of nulls above the rooflight (walls, floor, ceiling)
Adding the same space to the floor containing the rooflight and setting the ceiling element to null
Placing the shade
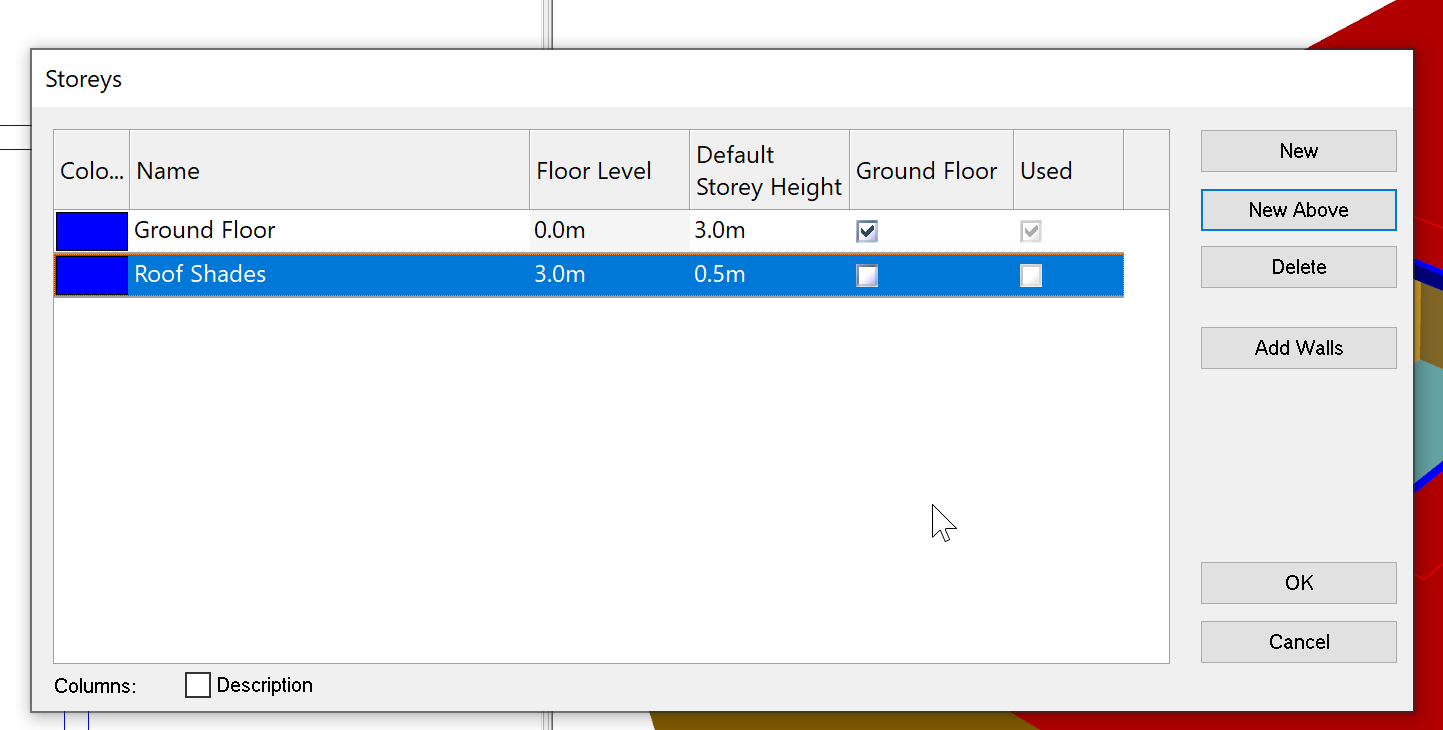
The ‘null space’ is added to a new Storey which has a short default wall height above the Storey containing the rooflight.
The second point ensures the null floor of the shade space does not merge with the non-null ceiling of the rooflight space.
First, draw a null space surrounding the rooflight:
Add a new Storey above the one containing the rooflight:
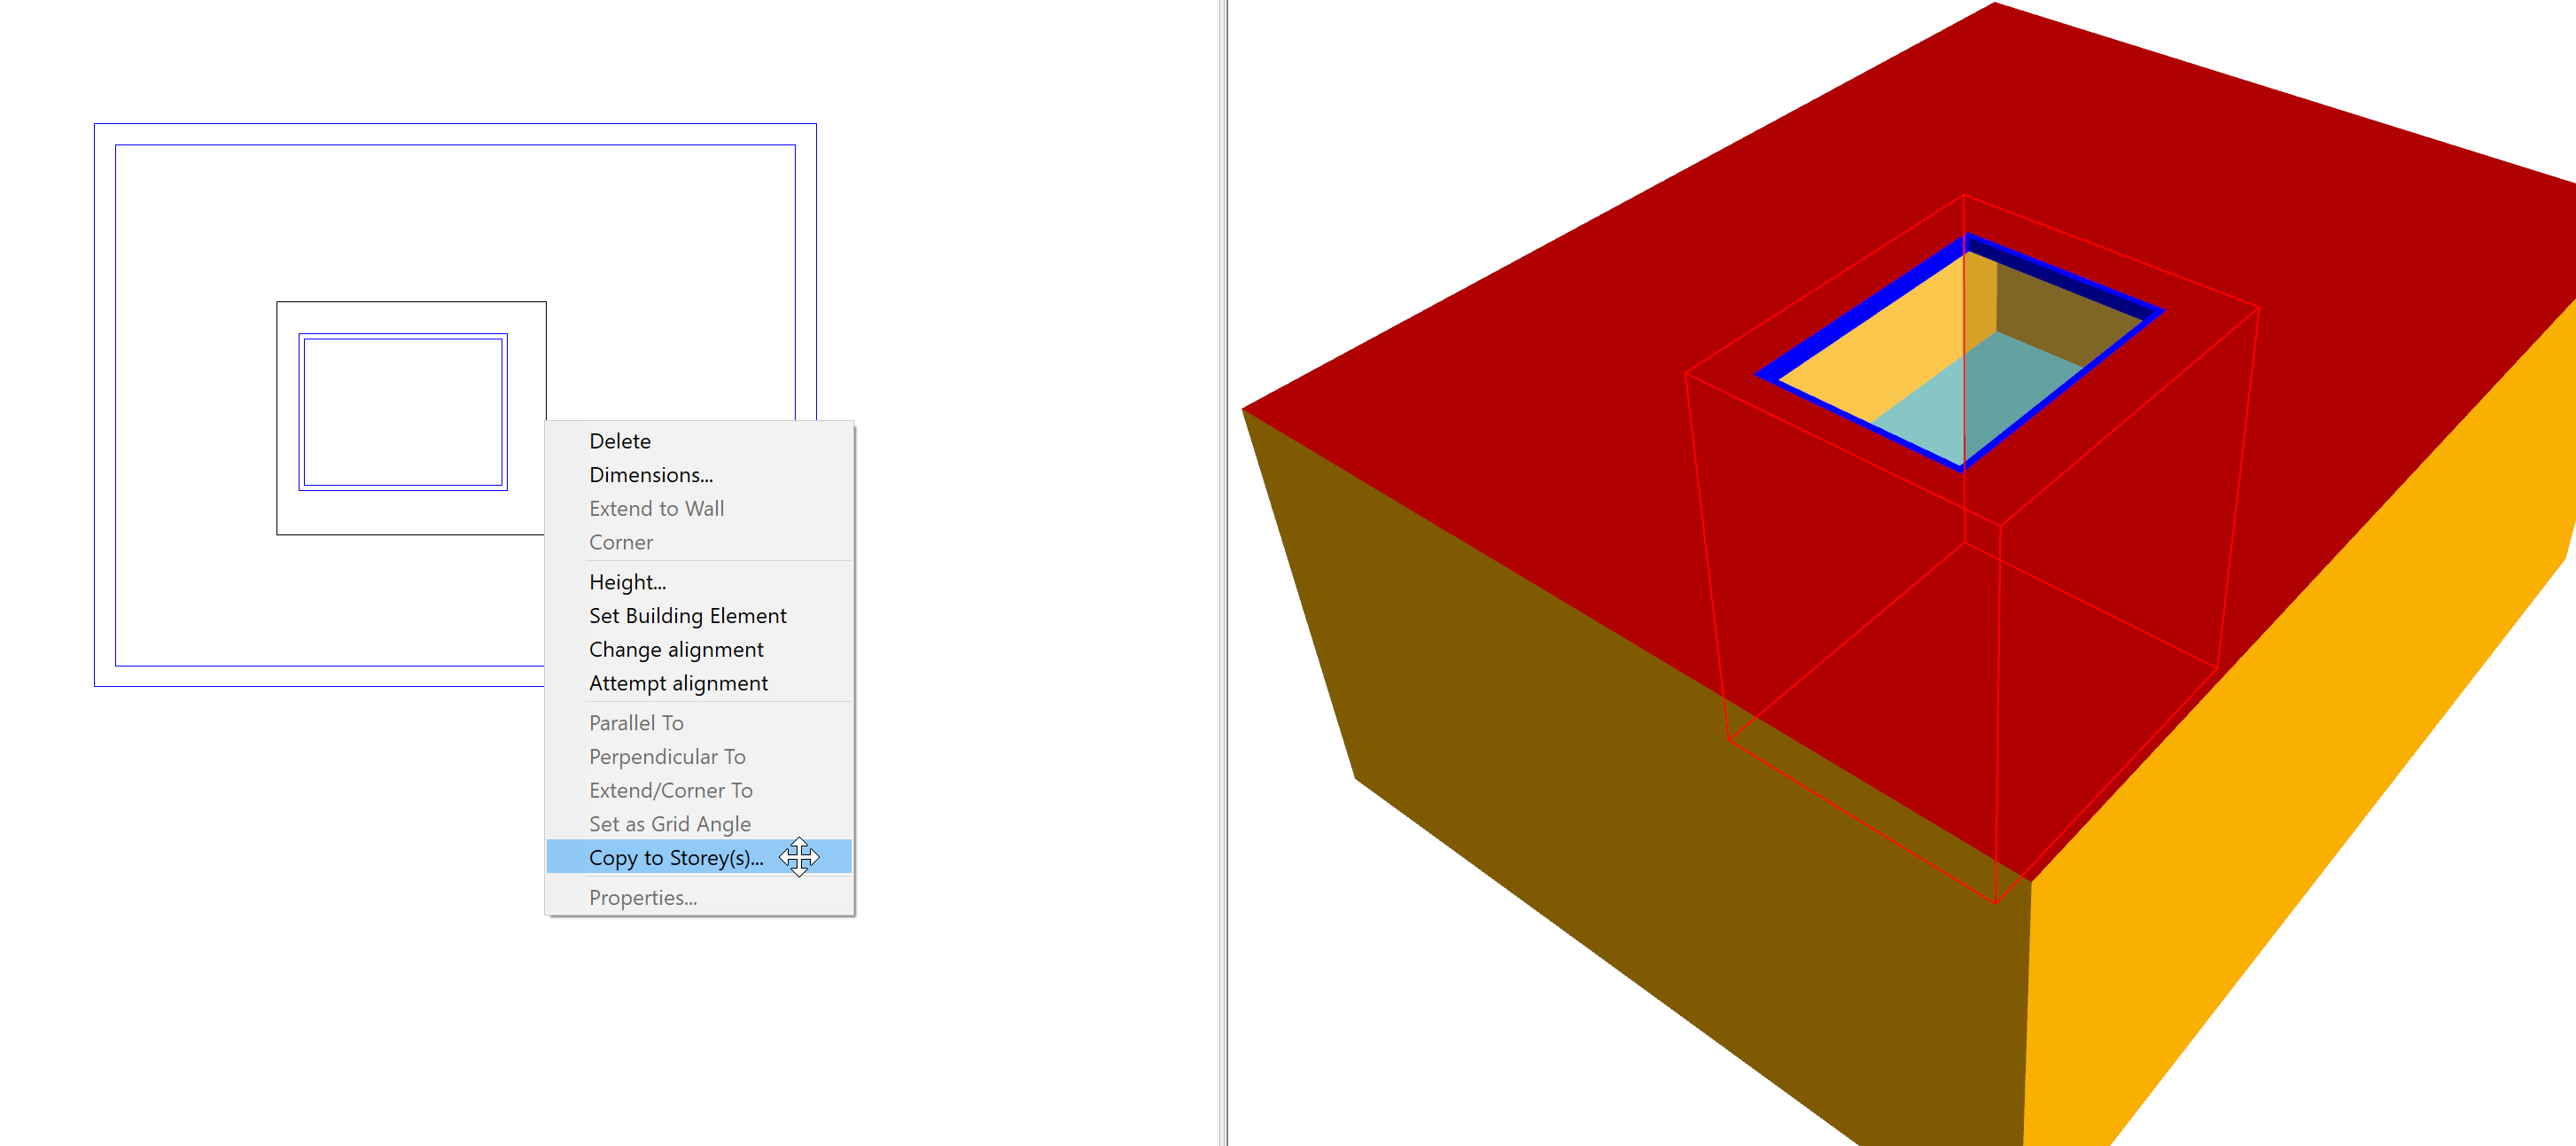
Copy the null space to the new storey:
Set the floor element of the storey containing the shade to Null, and the ceiling element to Null:
You can now place the shade.