Storeys
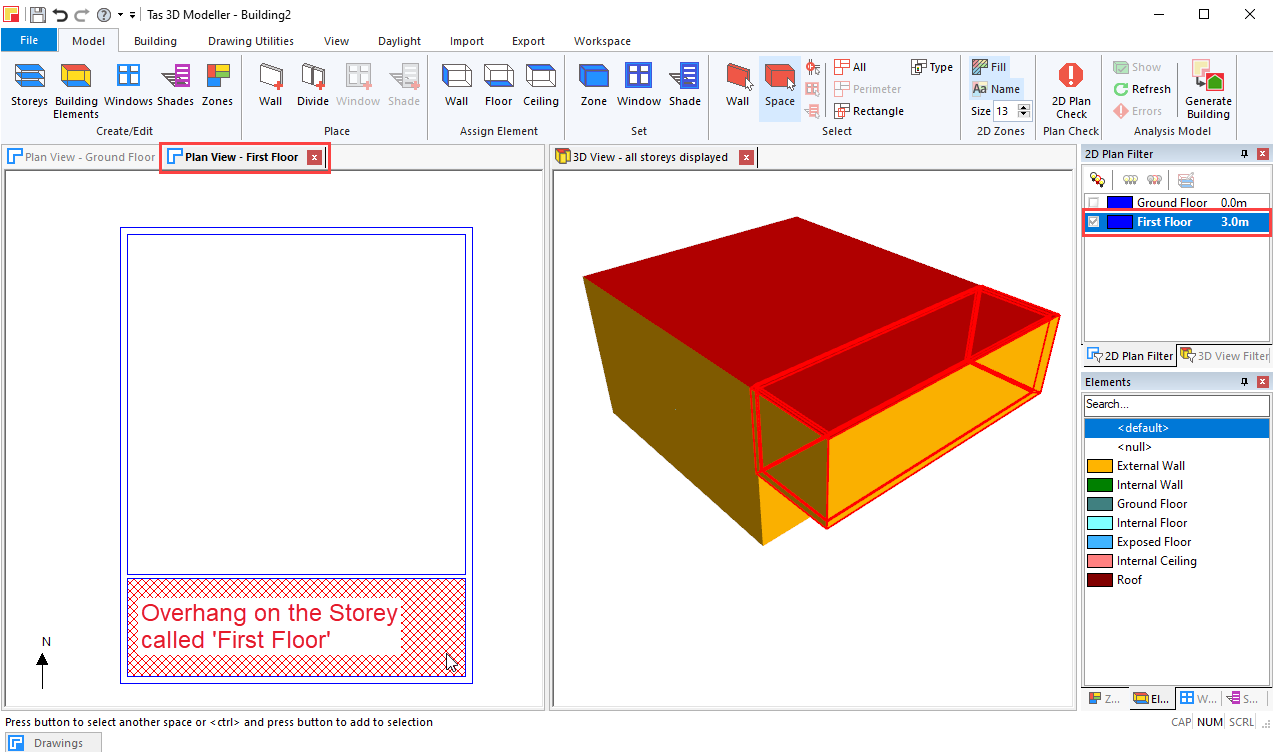
In the 3D modeller, all geometry is associated with a particular storey.
All walls, windows, and shades are placed in the model on a 2D plan view that is setup to edit a particular storey:
Creating Storeys
Each new 3D model has a Ground Floor storey by default. You can edit this default storey or add new storeys by clicking on Model >> Create/Edit >> Storeys in the ribbon:

Floor Level
The Floor Level of a Storey is the height at which the storey starts.
This value can be positive or negative, and the ground floor is usually at 0m with basements below 0m.
In the Building Simulator, air density does not vary with height. The only property affected by the absolute height of the geometry is the external air speed. It is assumed that the air speed in the weather file is measured 10m above the start of the ground floor. This effect is relatively minor, so entering the storey levels relative to mean sea level will have a minimal impact on the result.
Warning
Geometry on one storey must not intersect with geometry on another Storey.
Default Storey Height
The default storey height represents the default height of the walls placed on that Storey in the 3D modeller. This can be different on each Storey.
It is called the default storey height because the height of walls (and therefore ceilings/roofs and floors) can be changed by applying planes or setting their heights manually.
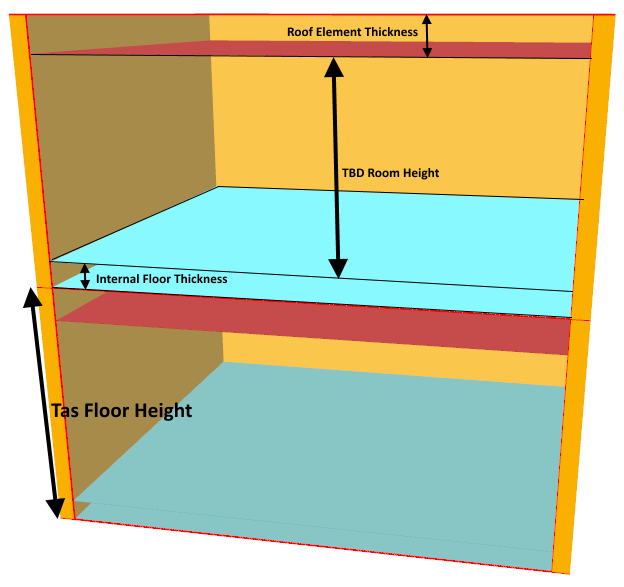
The storey height should be measured from below the floor finish to above the ceiling finish.
Ground Floor Checkbox
The Ground Floor checkbox is used in conjunction with the default Building Element in order for the 3D modeller to automatically apply the Ground Floor Building Element to the correct surfaces.
Used Checkbox
The used checkbox indicates which Storeys have geometry. If unchecked, it is safe to delete this Storey.
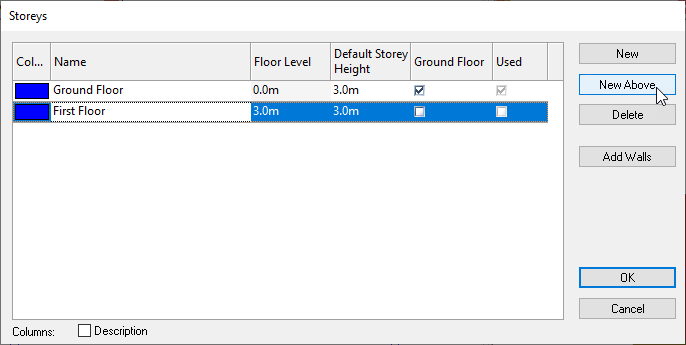
New Above
The New Above button adds a new Storey to the building in such a way that the floor level of the new storey is above the currently selected storey.
For example, if the first floor has a level of 3m and a default storey height of 3m, the New Above button will set the level of the new storey to 3m+3m = 6m.
Add Walls
The Add Walls button enables you to copy geometry from one storey to another:
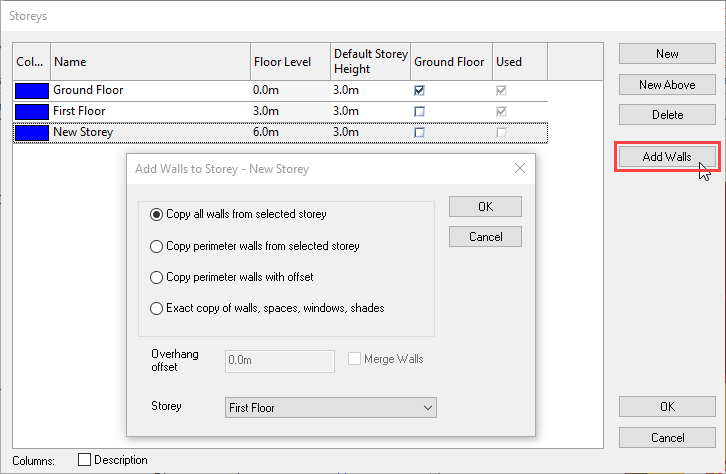
This option is only enabled if there is no existing geometry on the selected Storey.
This dialog can also appear when selecting an empty Storey in the 2D Plan Filter.
Special Storeys
Importing gbXML, IDF, INP and 3D shade surface geometry into the 3D Modeller will result in the creation of a new Storey where this geometry will reside.