2D Drawings
In order to place walls more easily, floor plans can be imported into a 2D plan view in the following formats:
DWG
DXF
Jpeg, gif, bmp
Wherever possible DWG files should be used, as they provide the most flexibility.
Prerequisites
Before importing a DWG, it is a good idea to set the orientation of the DWG to be the orientation you desire in the 3D modeller.
If your DWG contains 3D data, you may wish to save the DWG with a top-down view, although a default top down view will automatically be shown when importing.
Note
If you are importing multiple DWGs, the import process is easier if the drawings are all relative to the same origin and scaled correctly.
If your DWGs aren’t mapped to the same origin and aren’t scaled correctly, this can be corrected in the 3D modeller.
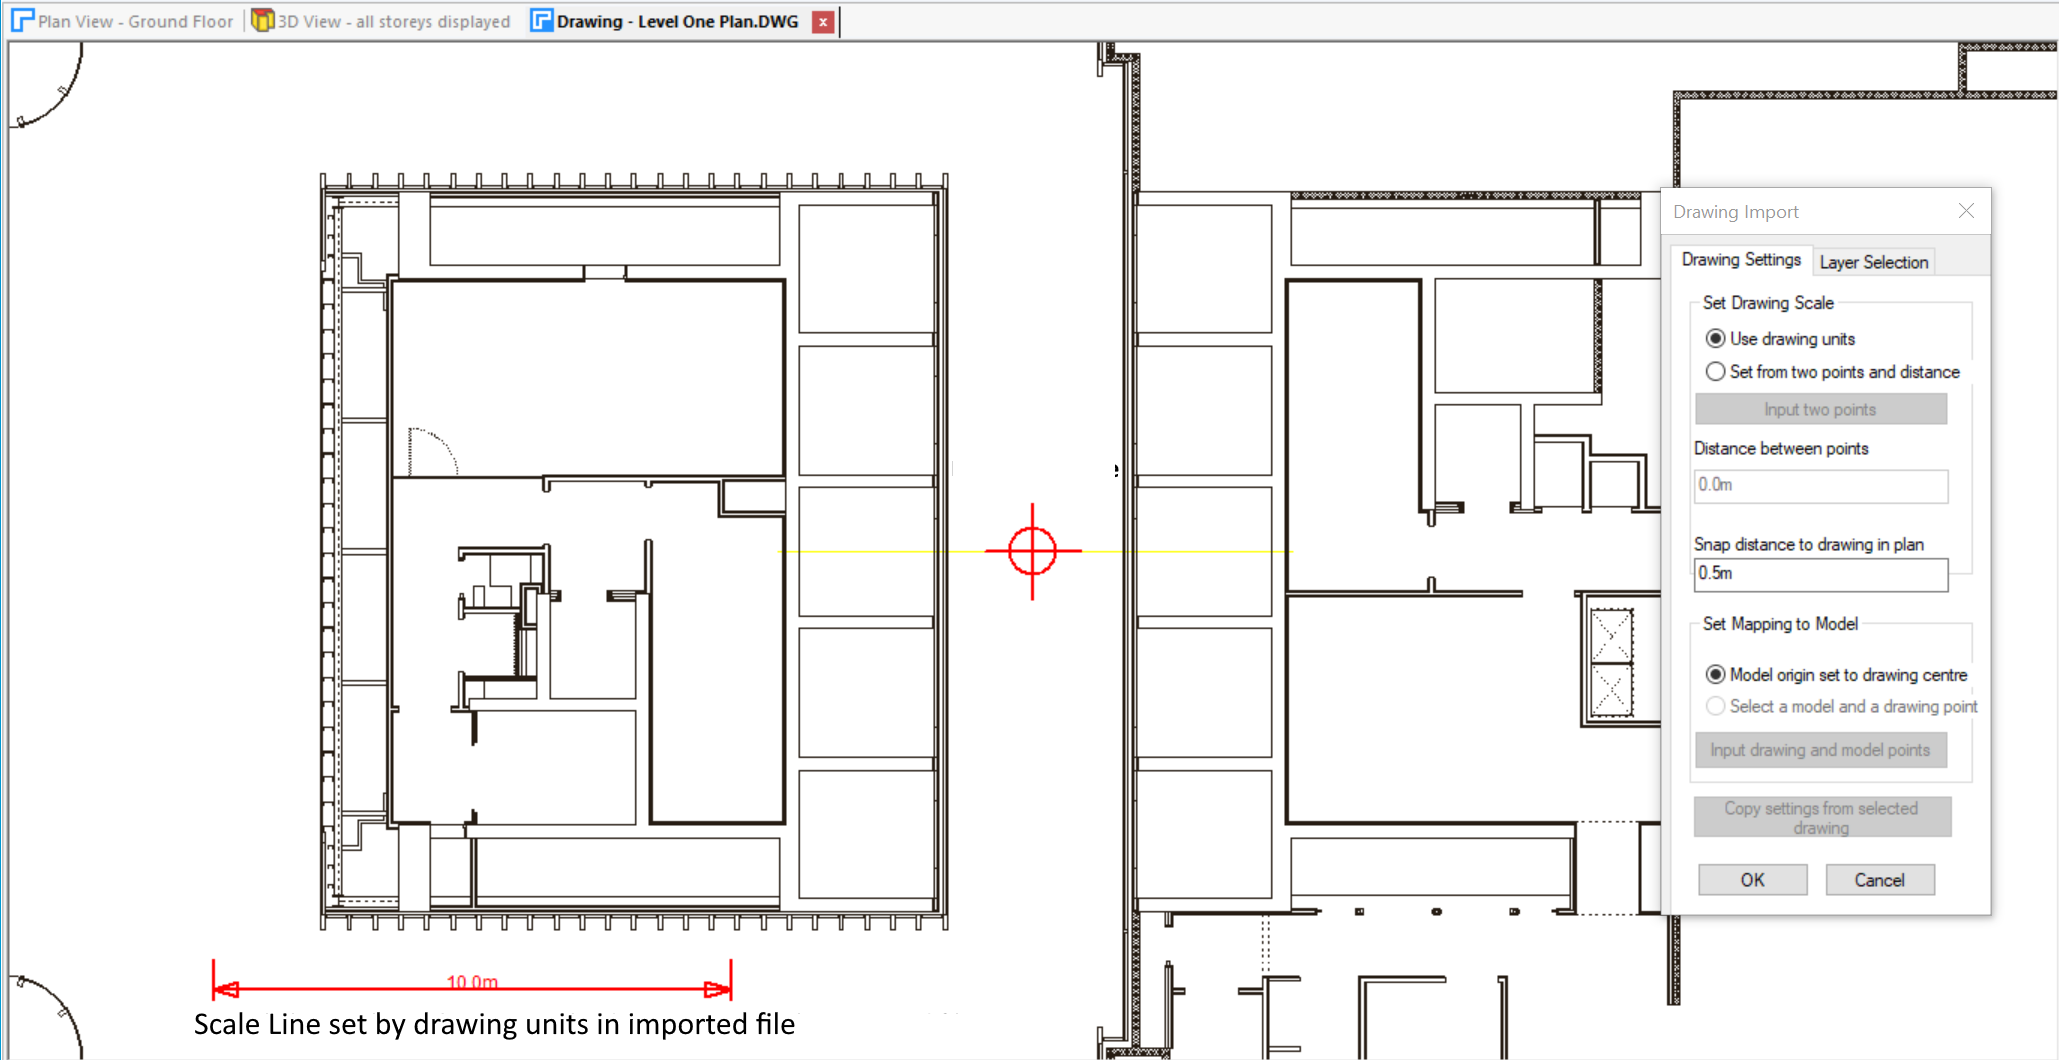
Drawing Scale
Once the DWG file is selected, a new view shows the drawing with options for the import. The default scale is shown, determined by the units in the DWG file.
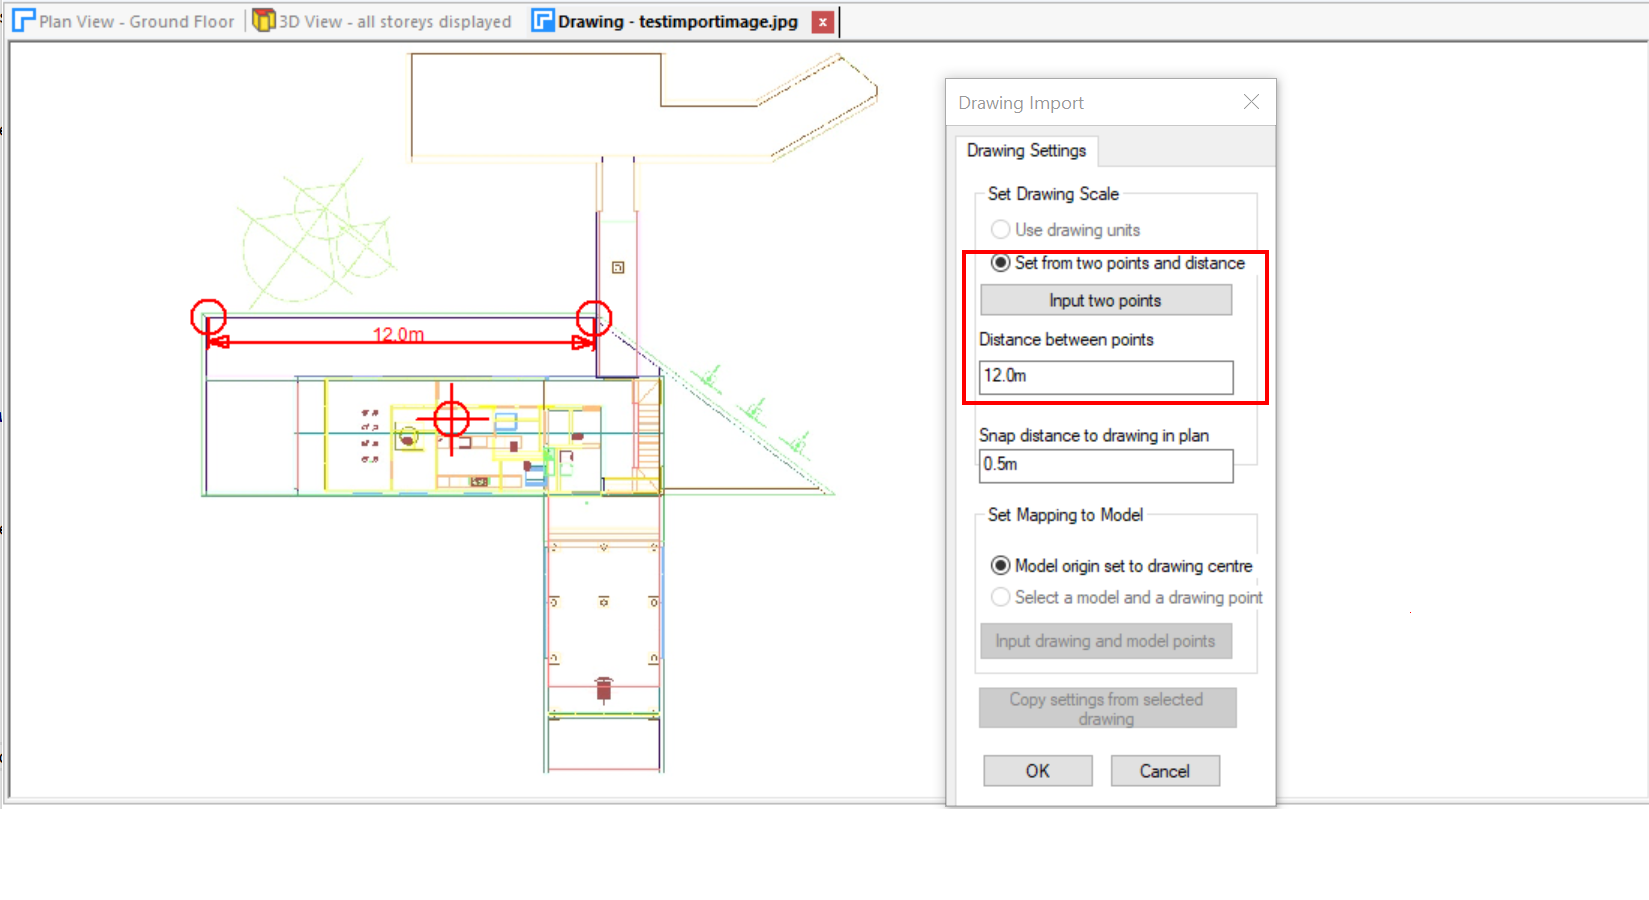
If the scale shown is not correct, perhaps because the DWG file does not have the correct units, then a scale can be set using the option Set from two points and distance. Select the Input two points button and you are prompted to select points on the drawing. The endpoint of any line on the drawing can be selected.
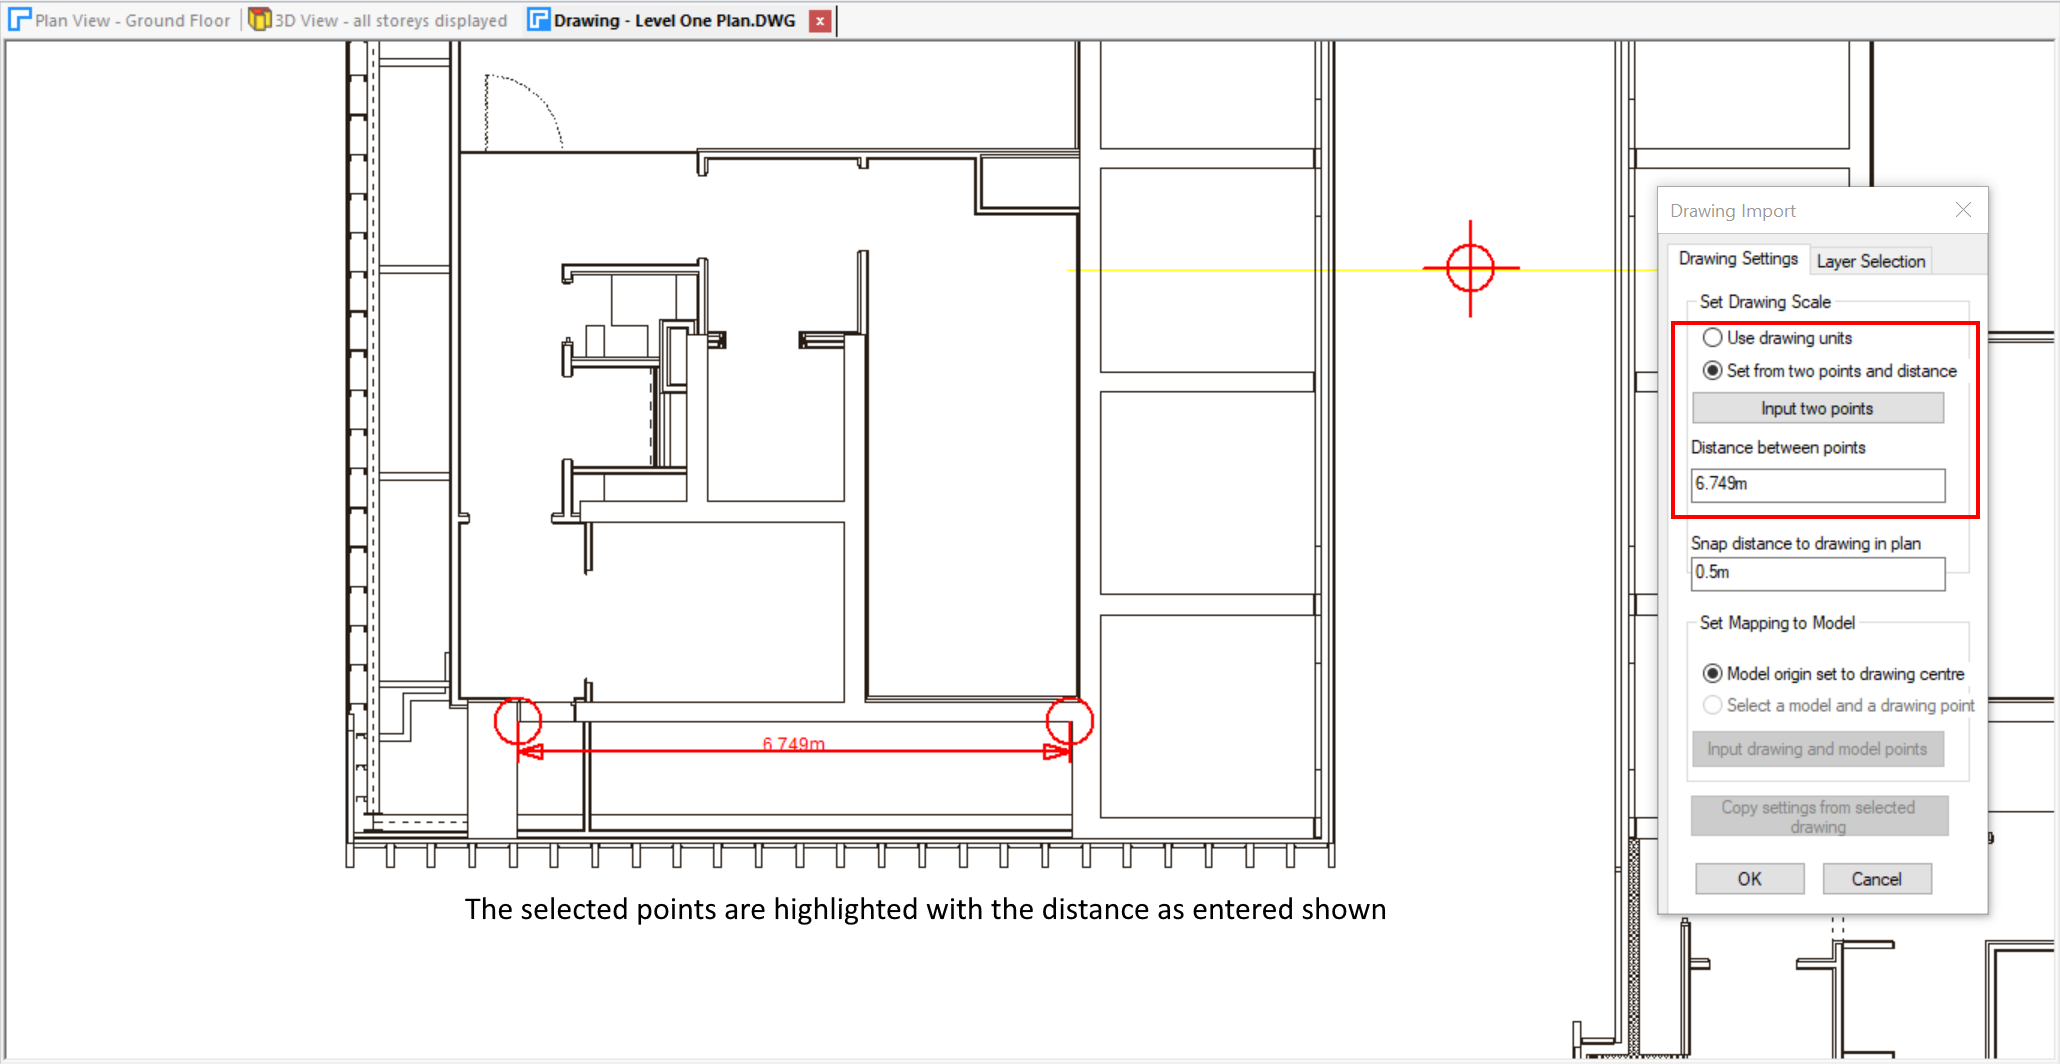
Enter the known distance between the two points.
Note
View >> Pan/Zoom options can be used to manipulate the Drawing View .
Model Mapping
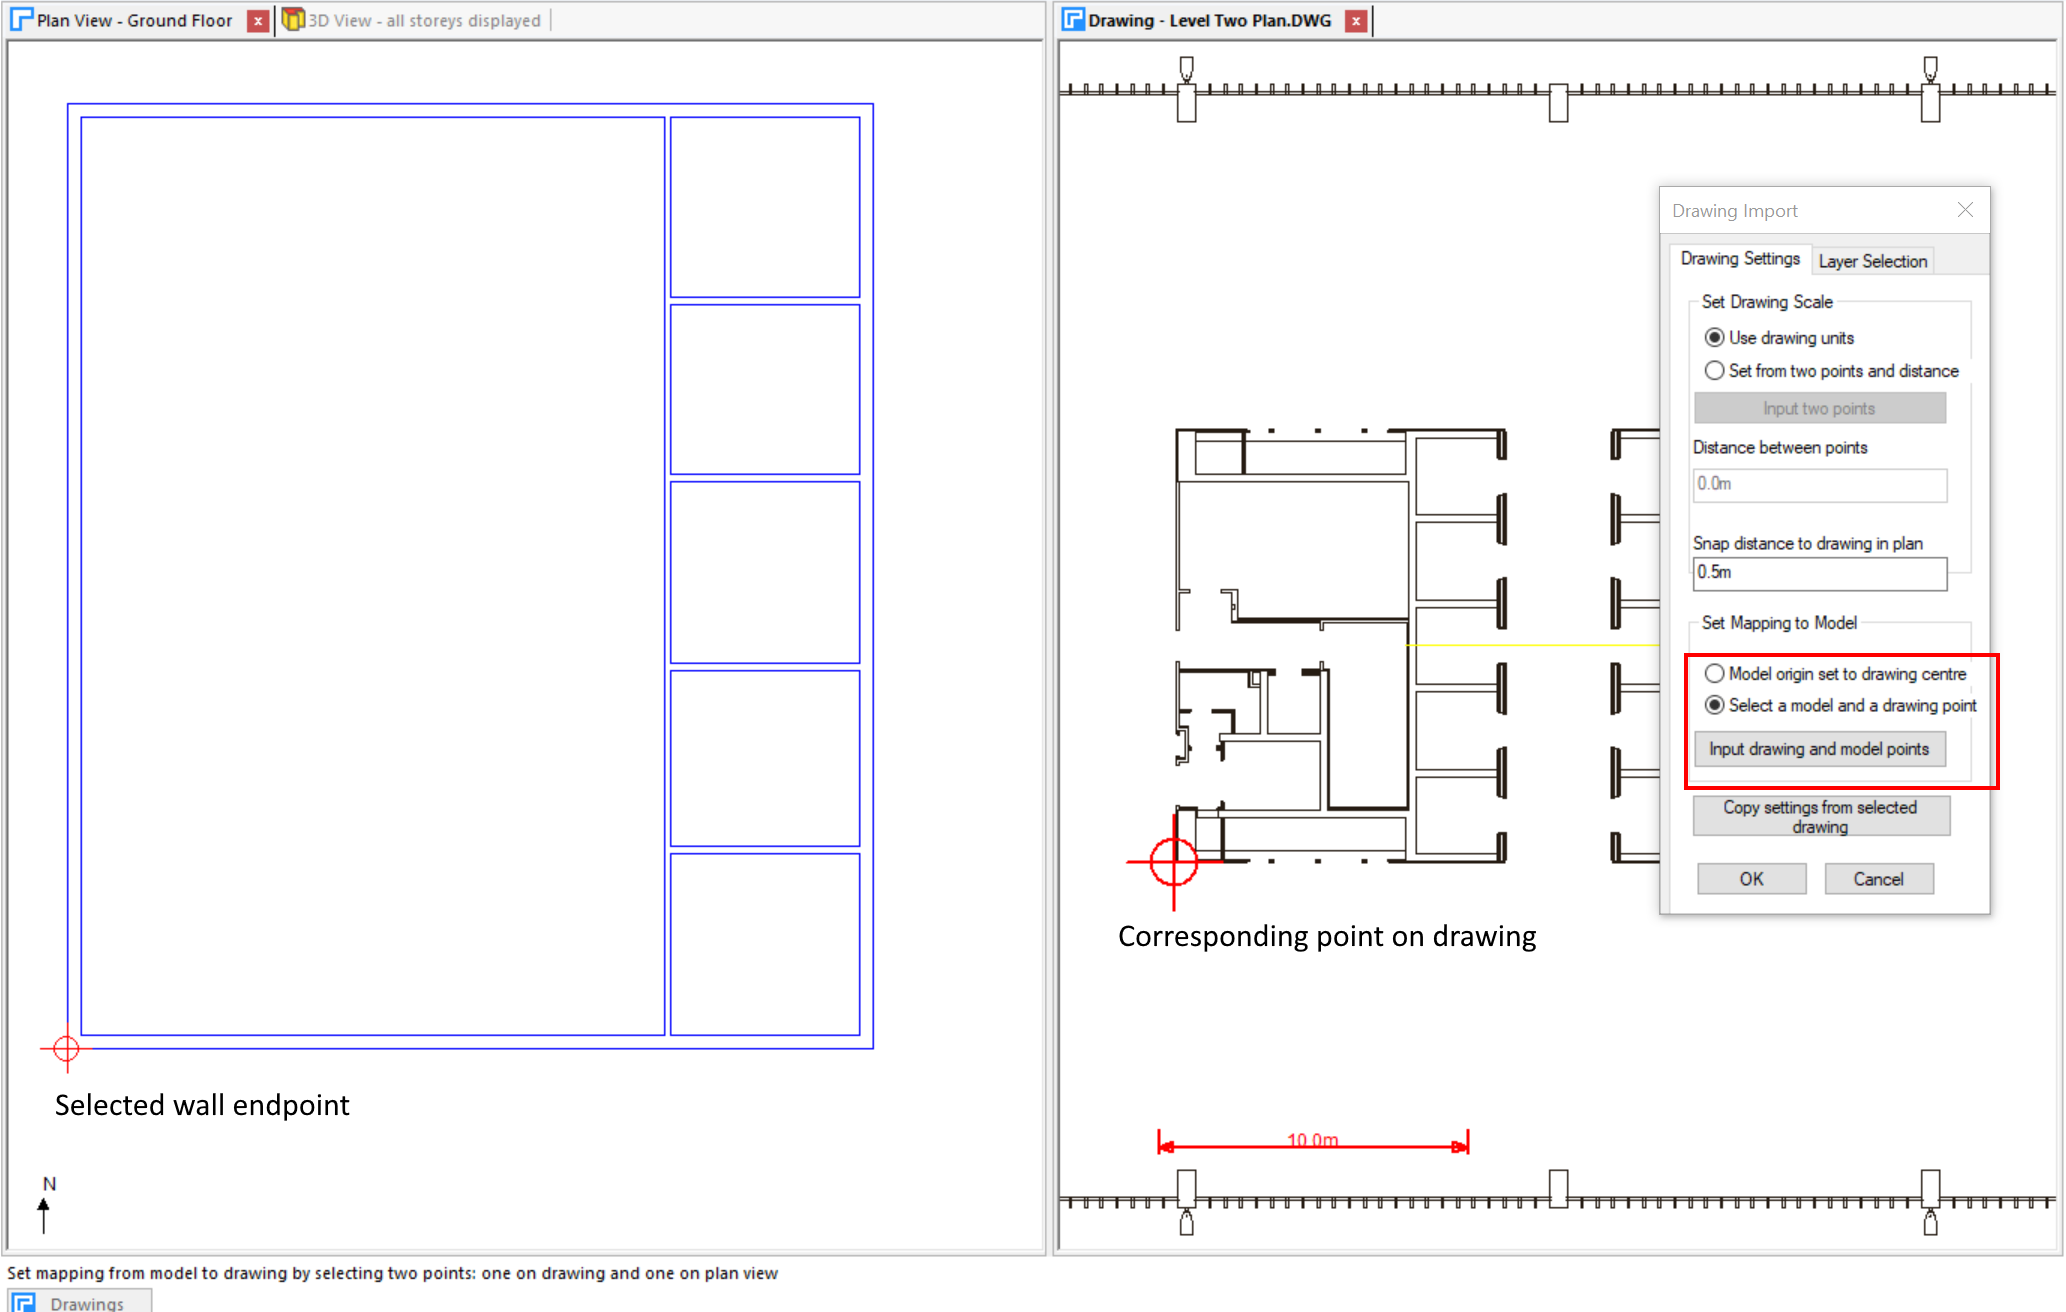
There is no need to Set Mapping to Model if walls have not yet been created in the model. The default is that the origin of the new model will be set to the centre of the drawing as shown.
Otherwise there is an option to set the correct alignment of the drawing relative to any created walls : corresponding points are shown on a model plan view and the drawing view.
Note
It’s a good idea to dock a Plan View next to the Drawing View when using this option.
Select the Input drawing and model points button and you are prompted to select a point on the drawing and the corresponding point on the plan view.
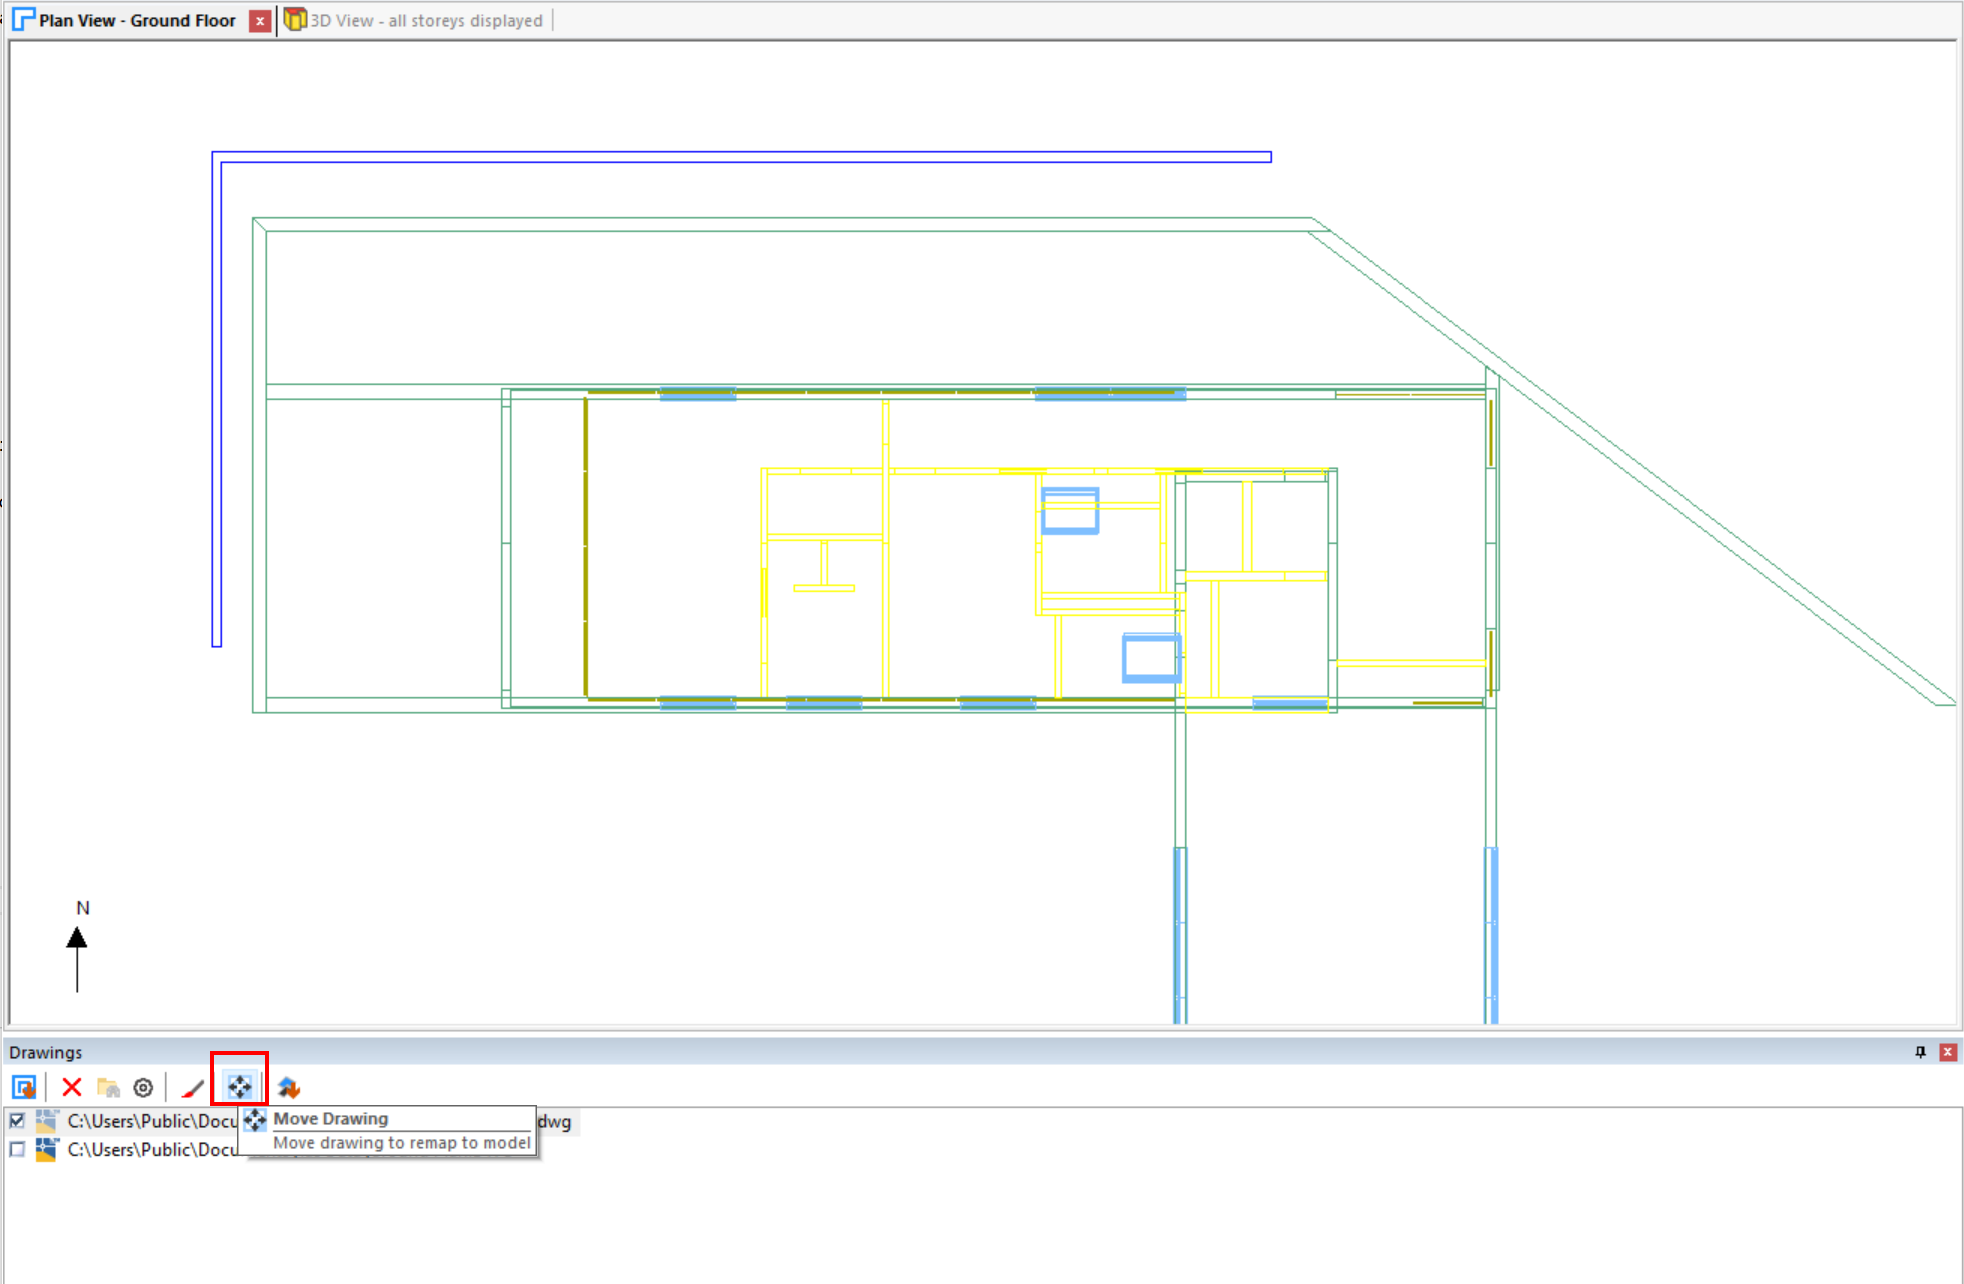
The Move Drawing option on the Drawings Sidebar provides an additional method to set this mapping after import.
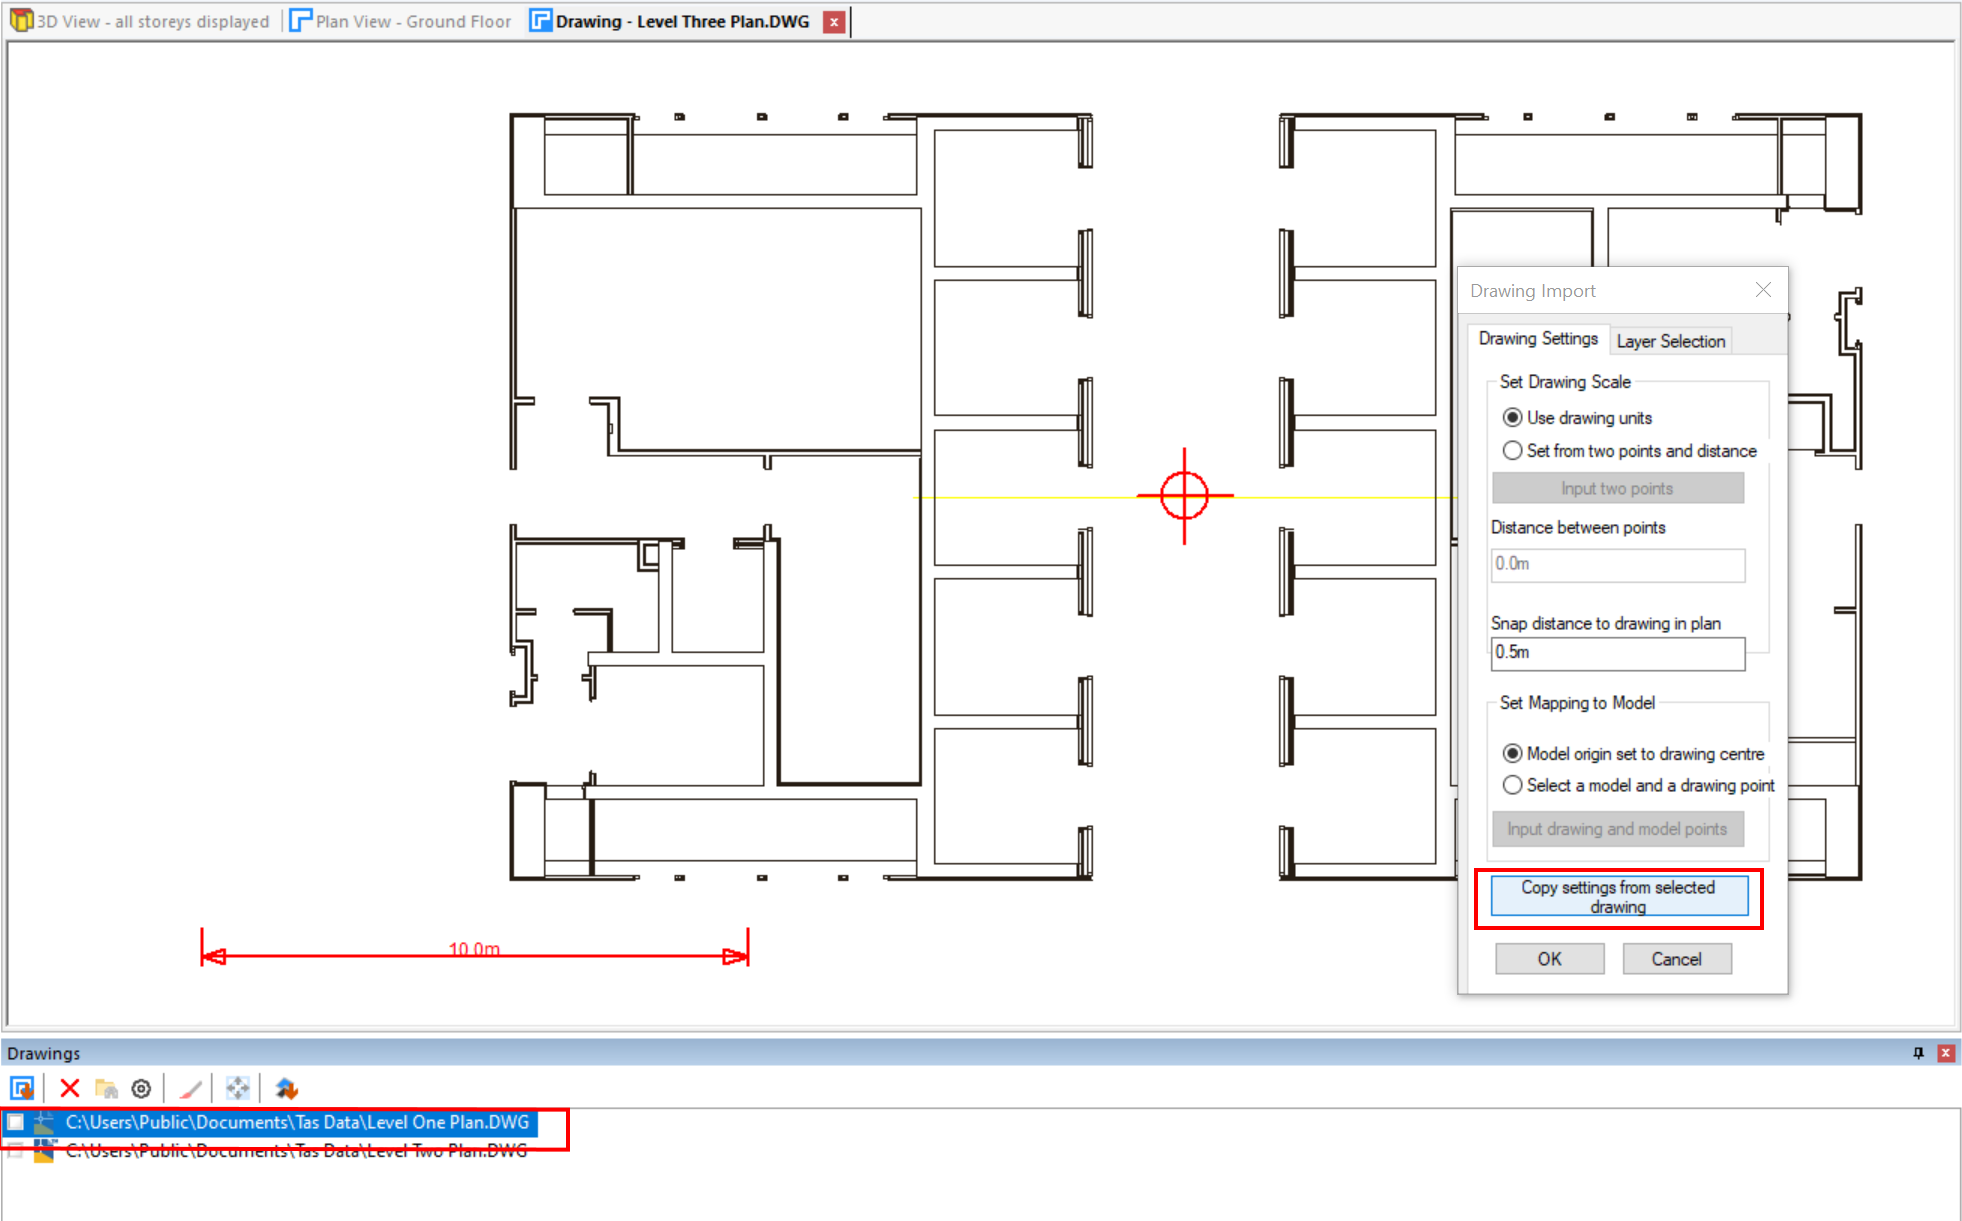
Copy Scale and Mapping
There is also the option to copy the scale and mapping settings from a previously imported drawing if the drawings are from a set for a building, perhaps showing different floors.
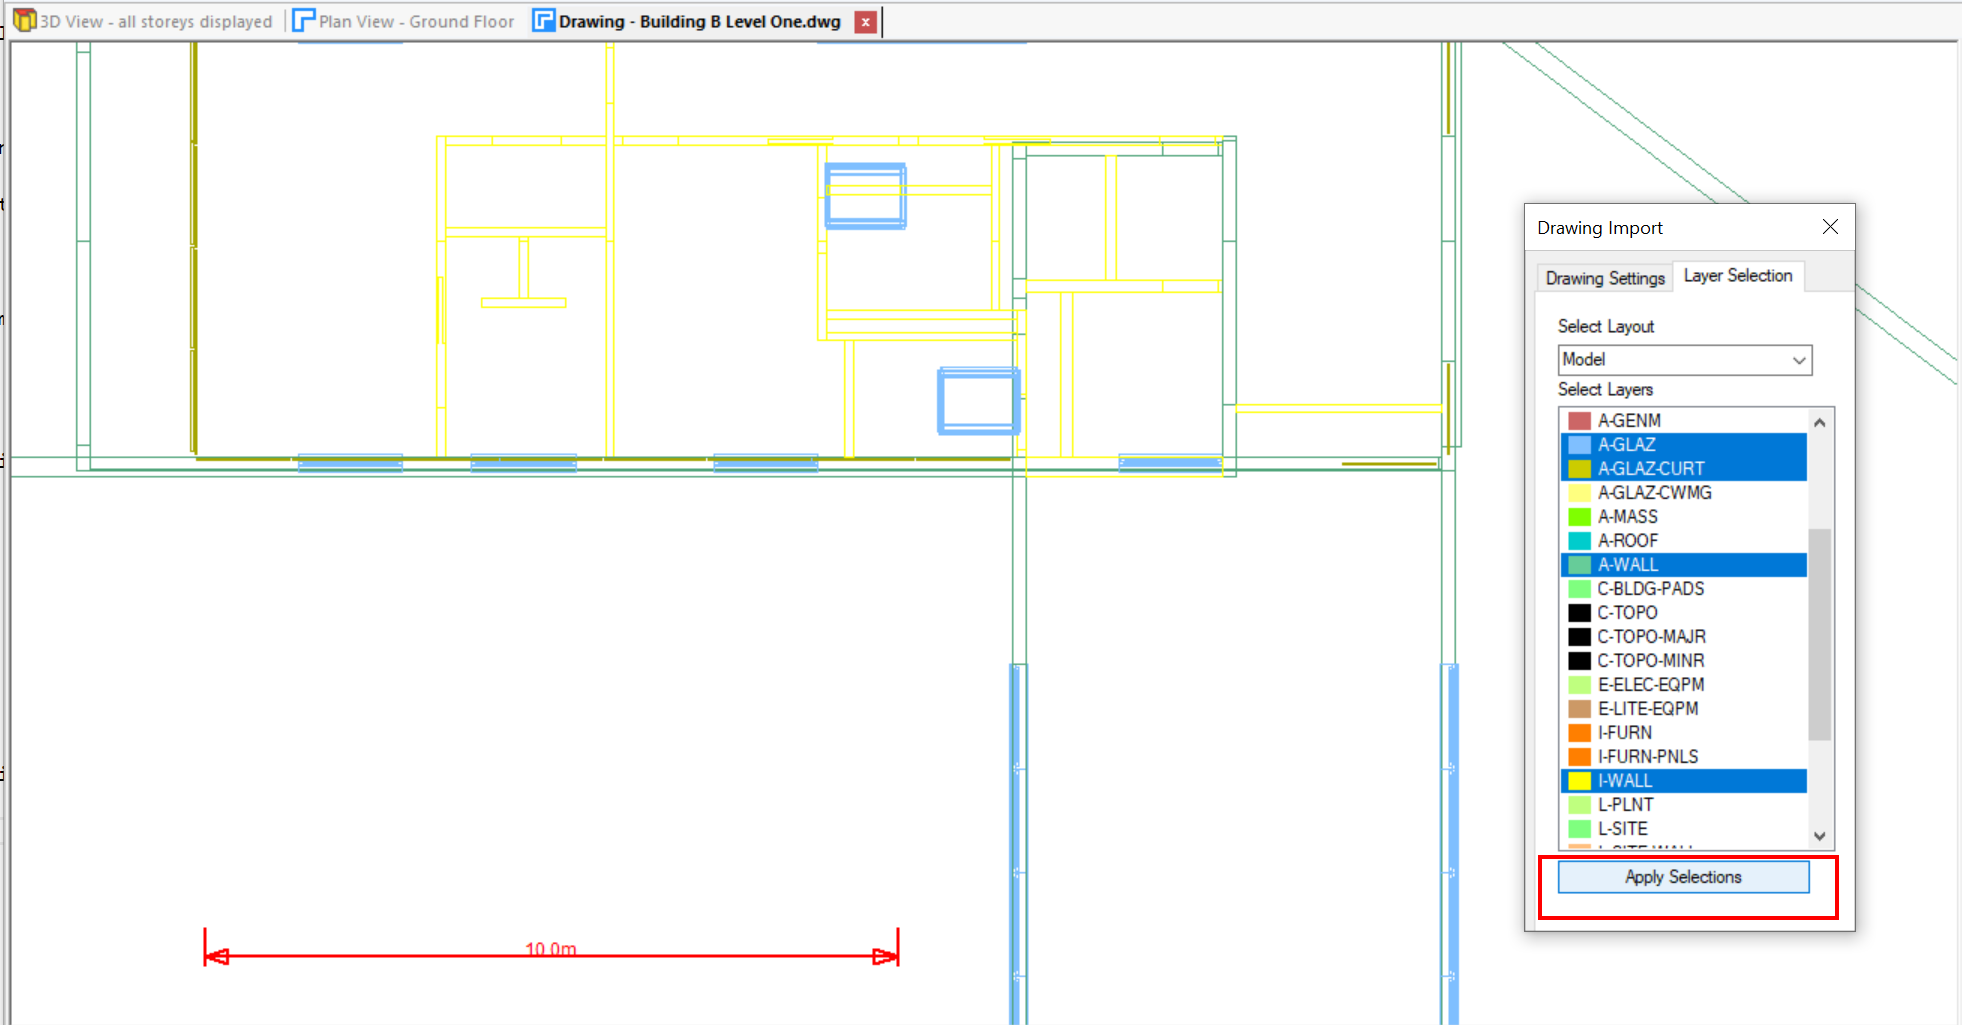
Layer Selection
All layers in a DWG drawing are initially shown.
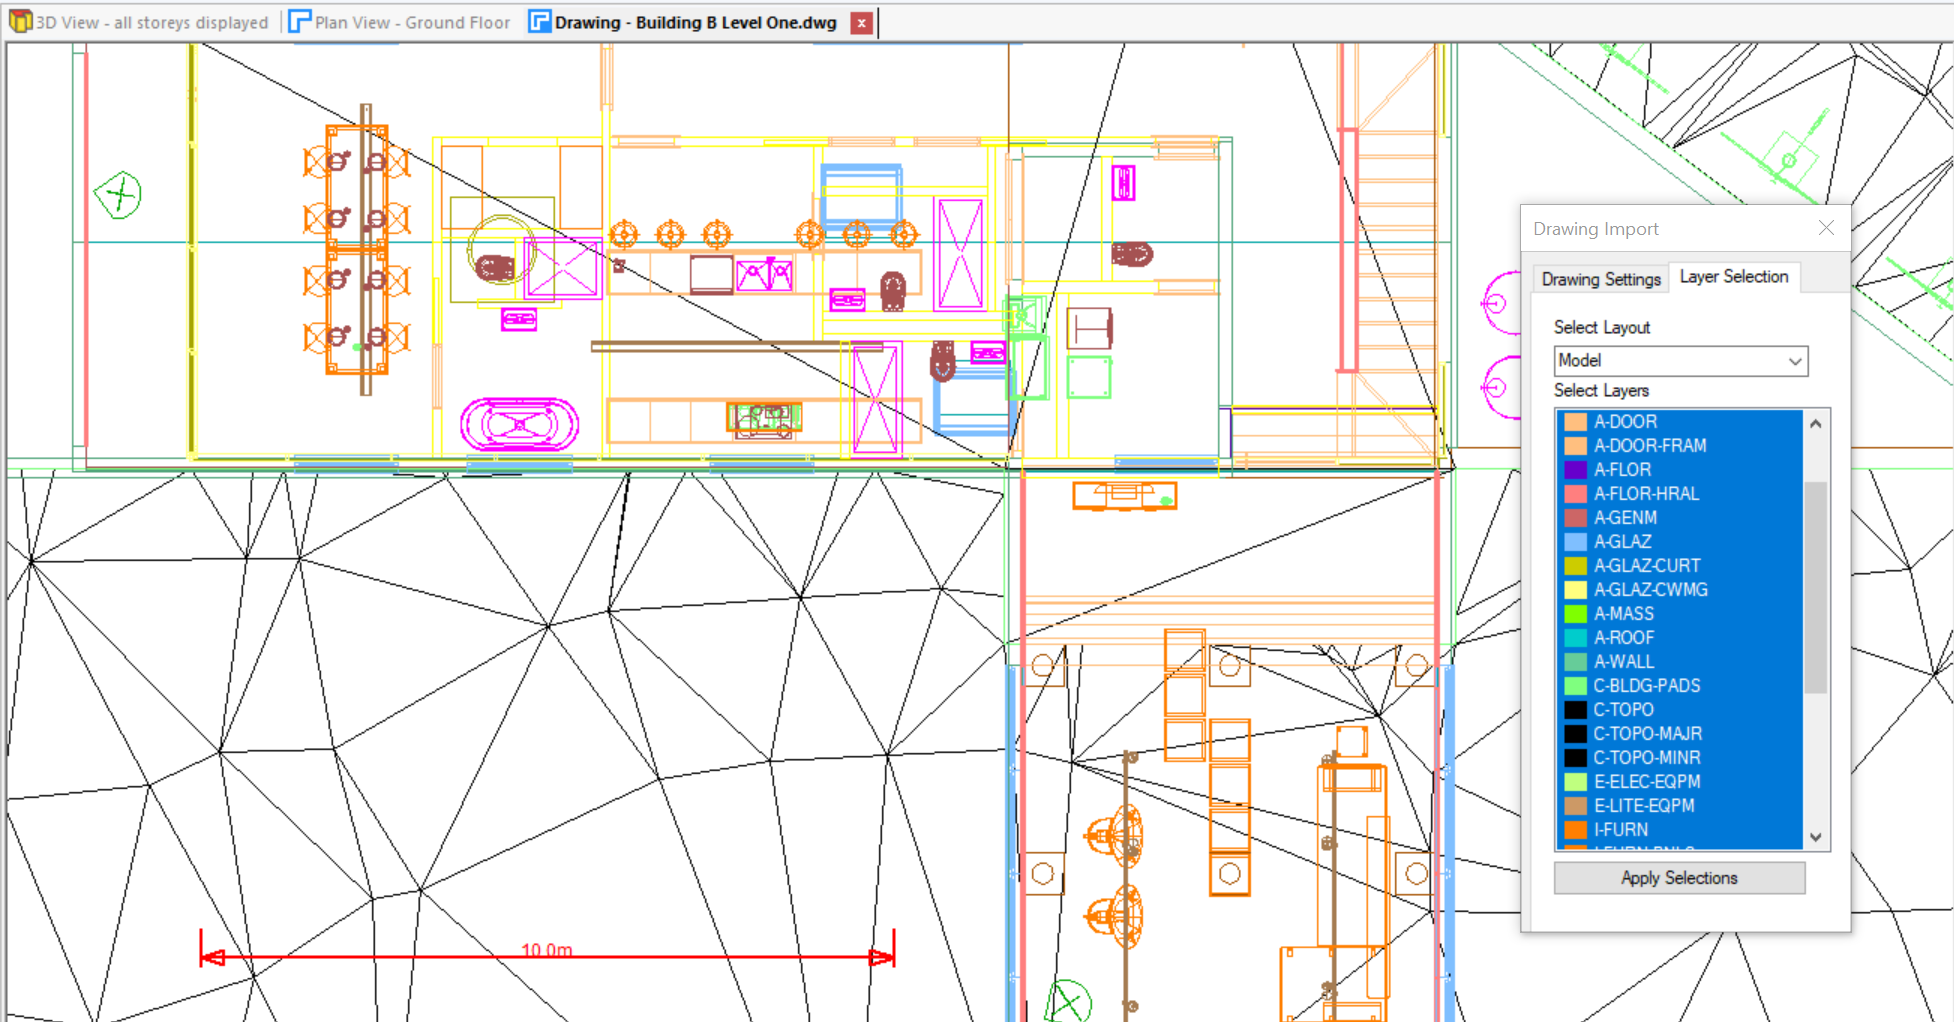
Select the layers required, for example those detailing the walls and windows to simplify the overlay displayed in the Plan View.
Multiple files
More than one file can be selected in the Open dialog for an imported DWG file. It is assumed that the scale and mapping is the same for all files.
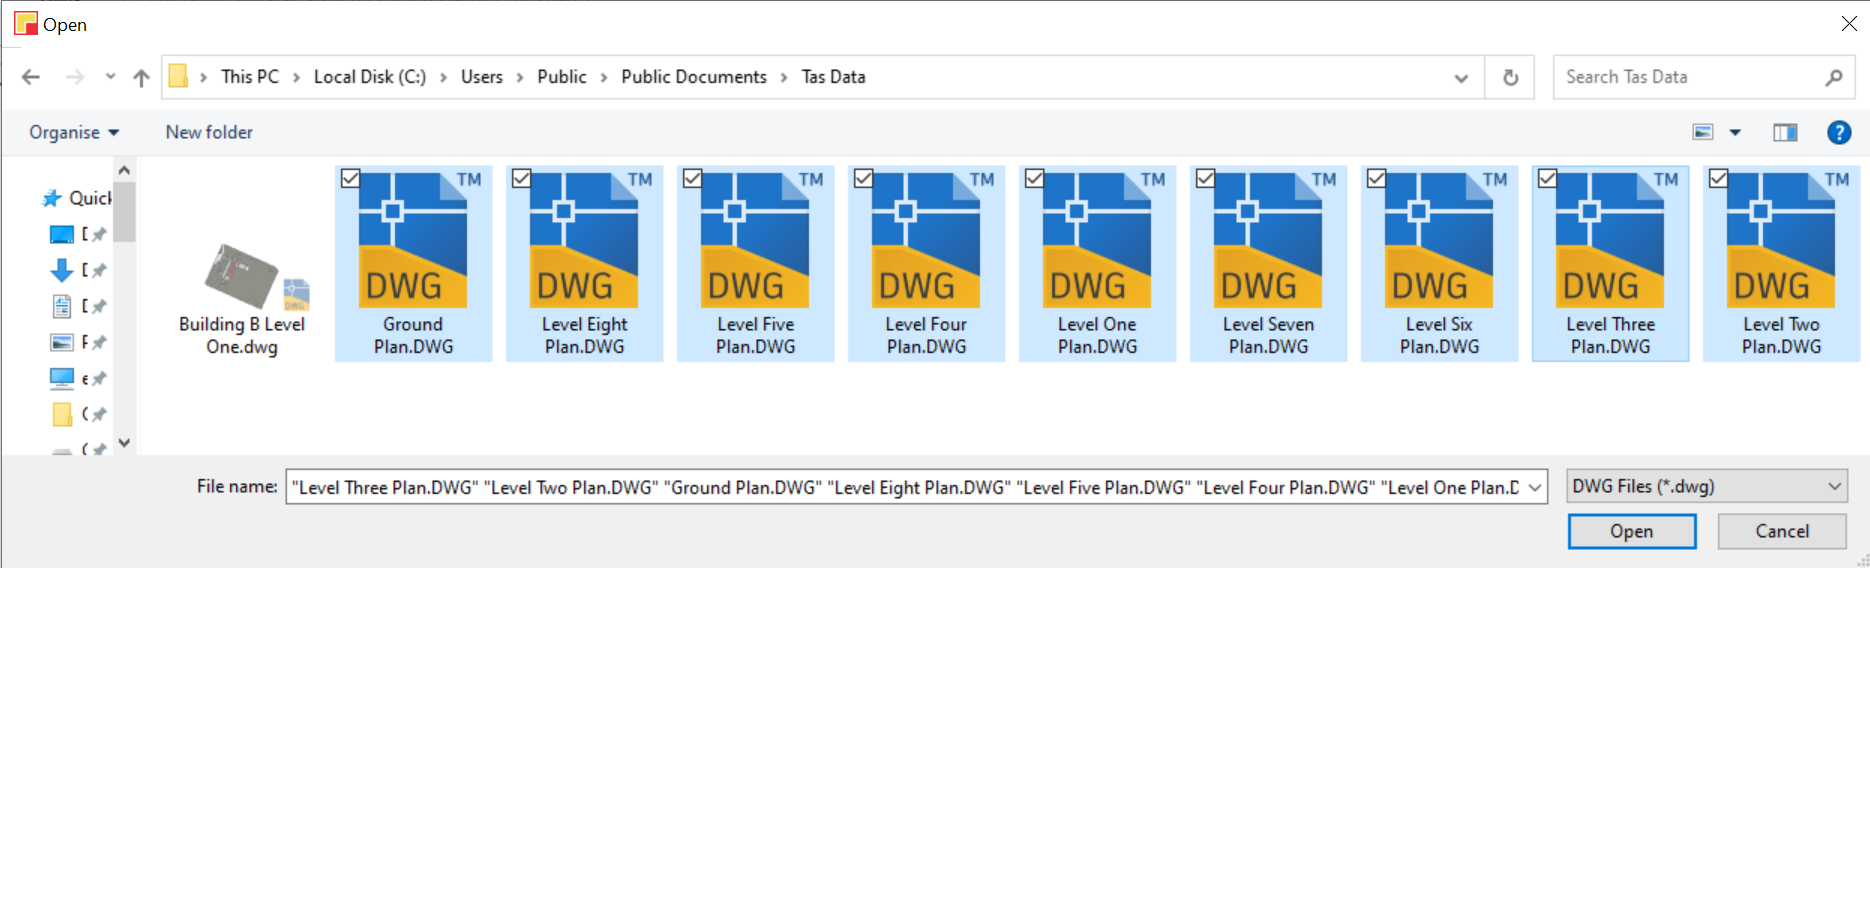
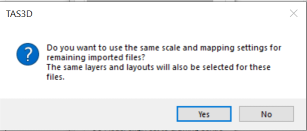
The first file is displayed in the Drawing View and the scale and mapping is set as usual. On OK you will asked to confirm that the same settings apply to all subsequent files.
You can change the settings for an individual file once imported using the Drawings Sidebar option. For example if a file requires different layers to be selected.
Use the option on the Drawings sidebar, to bring up the Drawing Import dialog.

Plan View Overlay
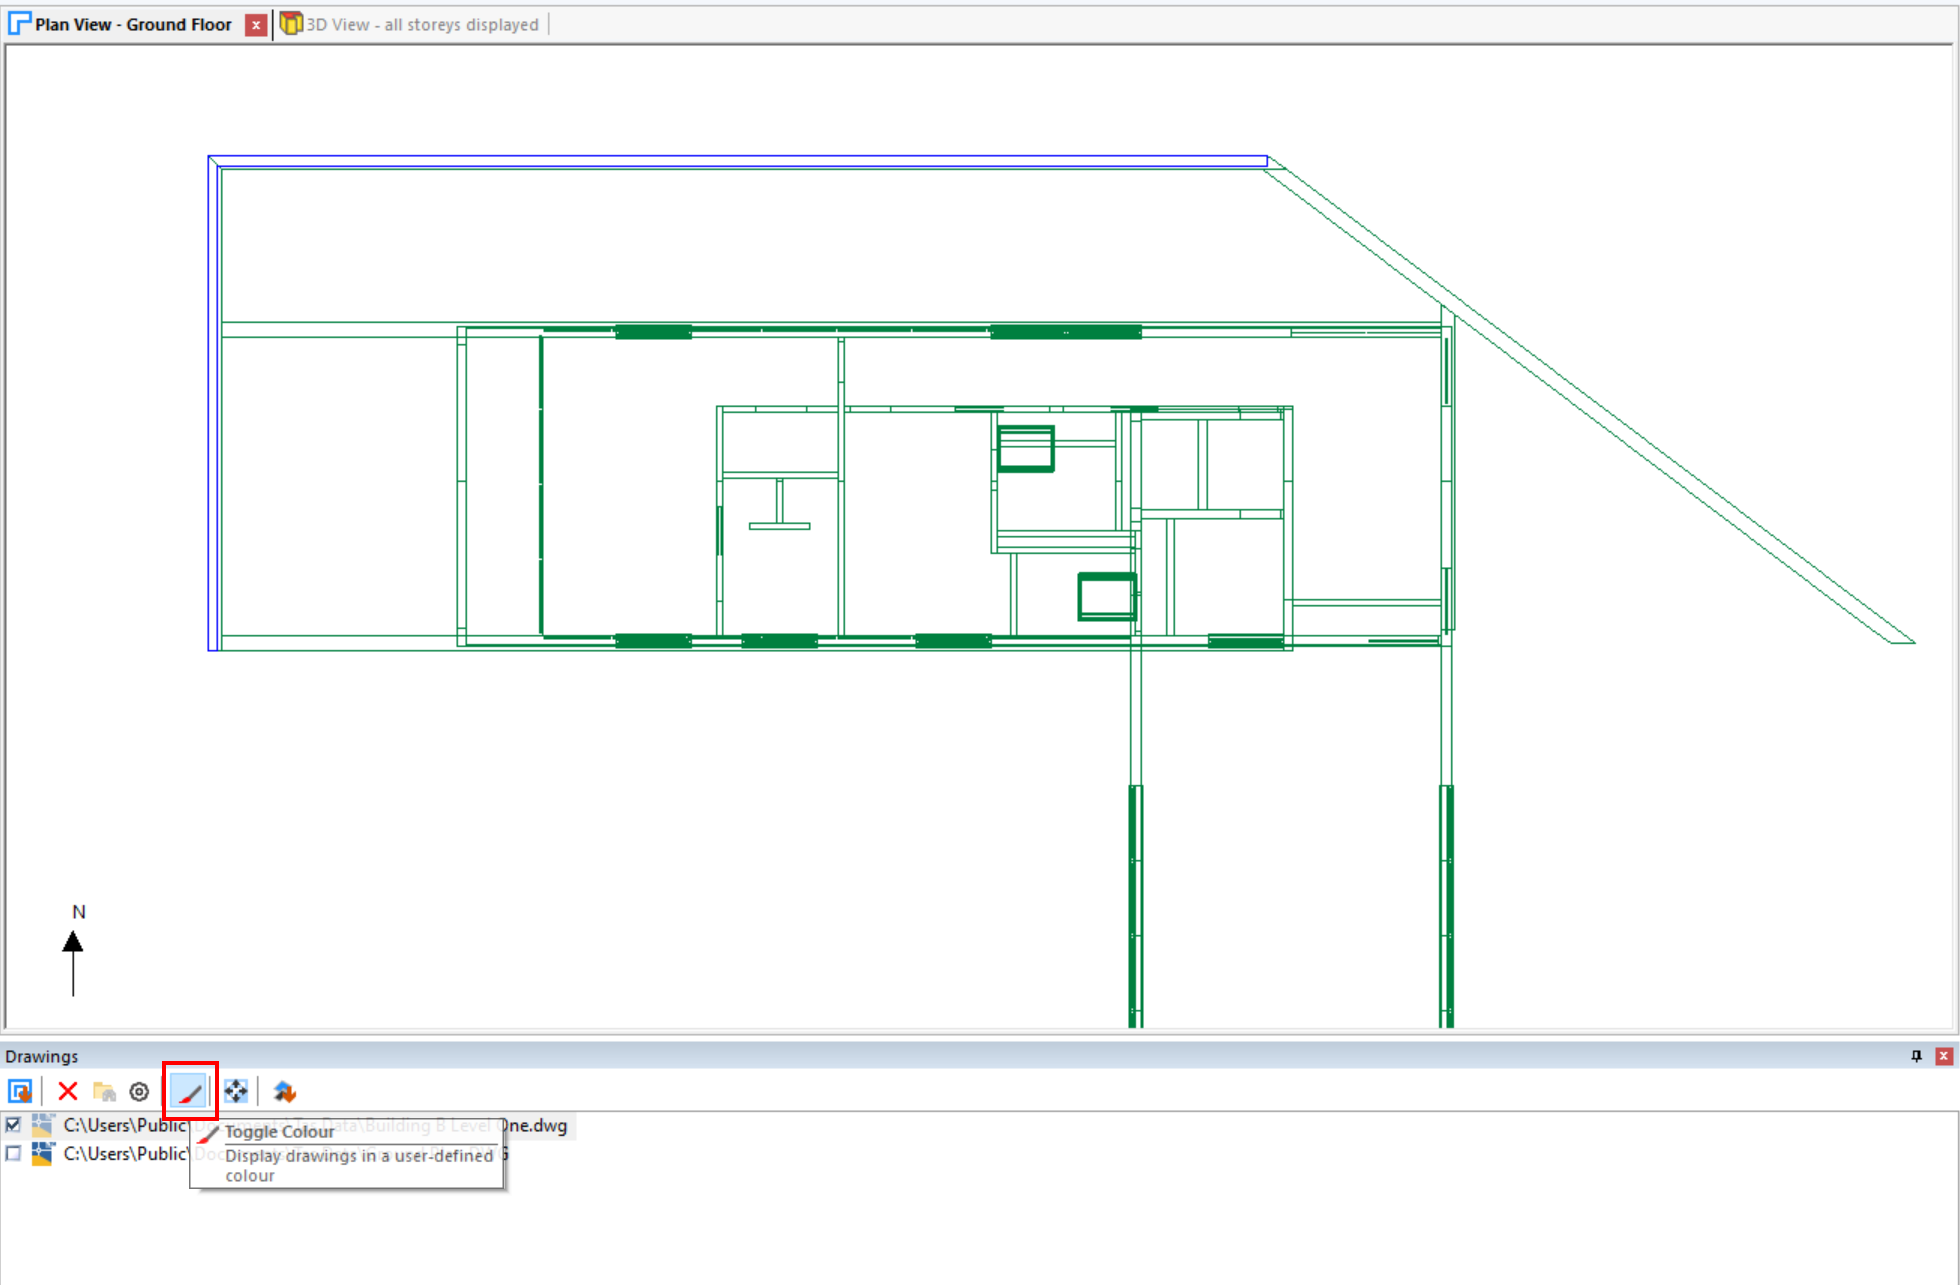
Select a drawing in the Drawings Sidebar to overlay with the current Plan View. If the ribbon option Drawing Utilities>>DWG Snap is selected when placing walls, the endpoint of a wall snaps to the endpoint of a line on the drawing.

The drawing is displayed in the plan view using the layer colours in the DWG file. An option is available to choose one colour for the drawing in overlay.
The Move Drawing option allows the drawing to be moved when displayed in a plan view to realign it with the walls if the mapping needs to be corrected. This can be useful if there is a revised drawing which no longer maps exactly.
Update File Location
If a t3d file is moved to a new location it may reference an imported file in a location that is no longer correct. This will be indicated in an error message when the t3d file is opened.The new path for a DWG file can be set using the Change path option on the Drawings Sidebar. If other referenced DWG files have the same original path you will be asked if all such files also need correcting.
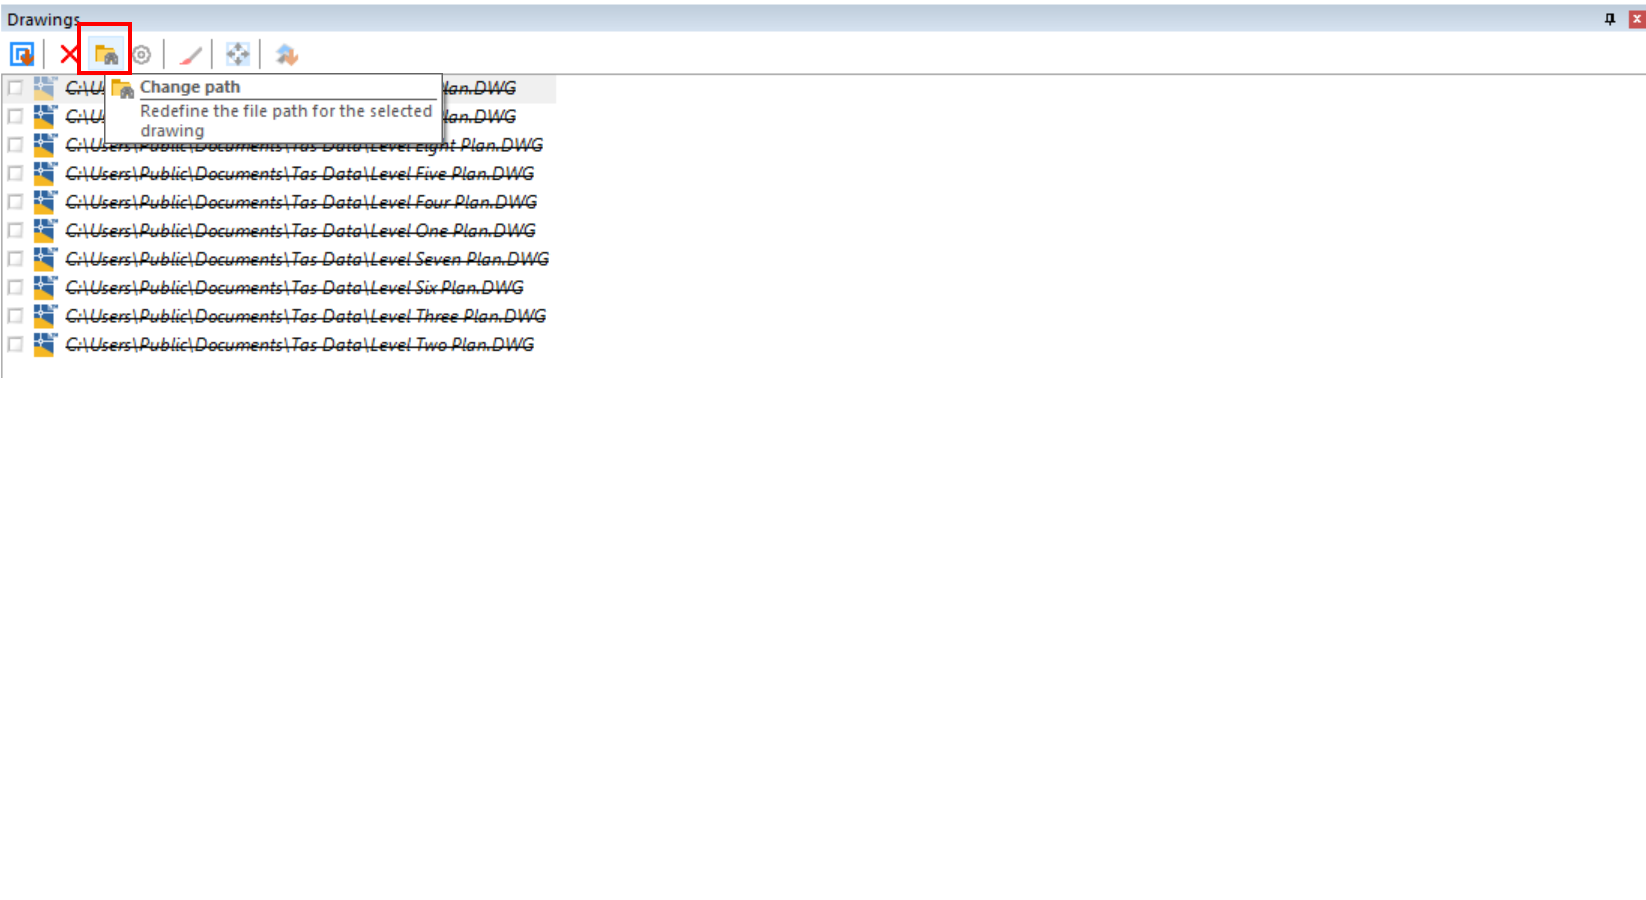
Image Import
When an image is imported, there is no default scale and therefore the scale must be set by two points on the image and a distance.
It is not possible to import multiple image files.
The options to manage image files and overlay the image on a plan view are mostly the same as for DWG files other than snapping is not available and the Toggle Colour option cannot be used to display the image as a single colour.