Zones
Zones are applied to spaces in the 3D model to distinguish which areas in the model should be analysed.
In the Building Simulator, zones are comprised of a number of surfaces (each with a Building Element) and their constructions, and they have an associated volume of air.
Note
In the Building Simulator, the air associated with a zone is assumed to be homogeneous.
This means the air is assumed to be of a uniform temperature and relative pressure. You should therefore assign zones very carefully in the 3D modeller.
Creating Zones
Zones can be created via Model >> Create/Edit >> Zones in the ribbon. The create/edit dialog will open:
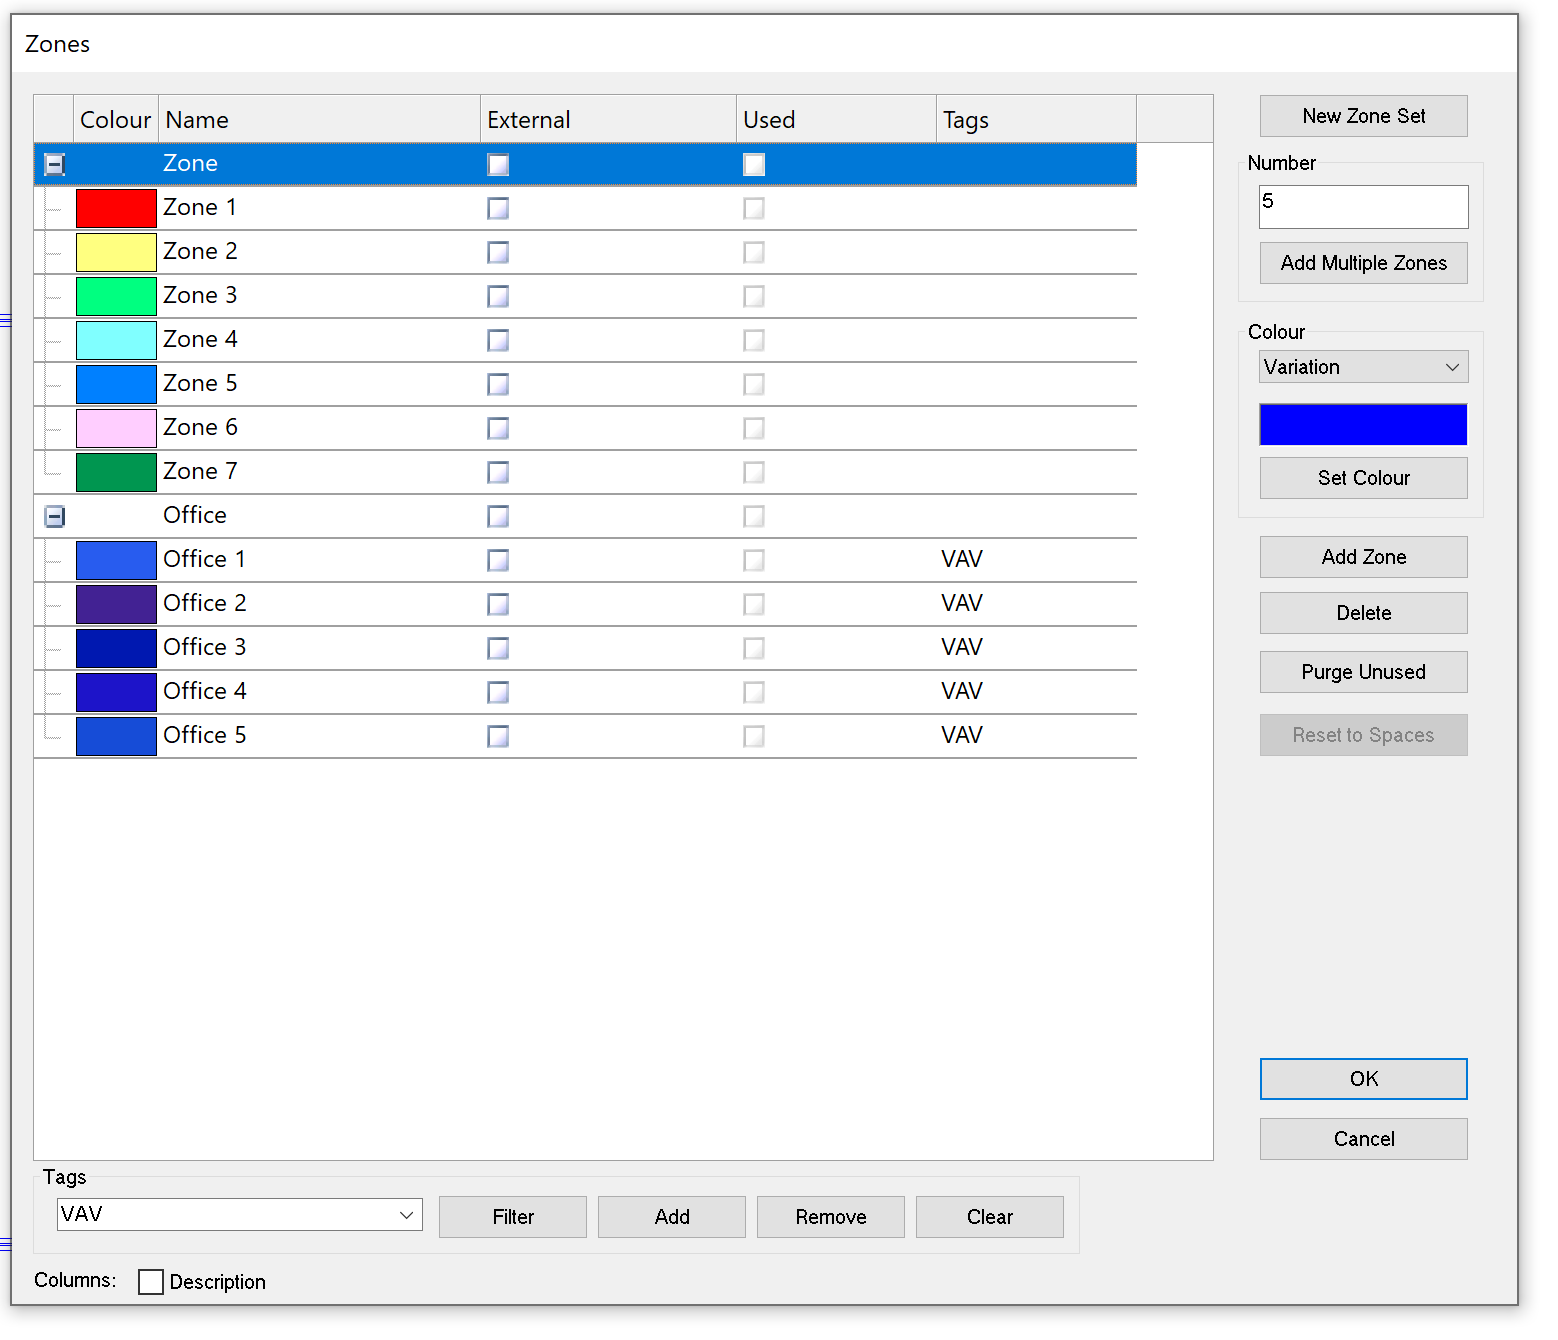
Zone Sets
All zones belong to a Zone Set. In the diagram above, the office spaces belong to the Office zone set.
If you rename the zone set, the 3D modeller will offer to rename the prefix of each of the zones in that set automatically.
If you use the Building Wizard in the Tas Manager and choose to use a template, some zone sets will be created for you which can be used to automatically assign internal conditions to zones later in the Building Simulator.
Zone sets are a way of organising zones, but the way in which you use them is completely arbitrary. You could group them by:
Storey
HVAC type
Internal Condition
Additionaly, you can organise zones by using Tags.
External Zones
The External Zones checkbox is used to indicate that a zone is knowingly open to the outside. This is often used when modelling shades:
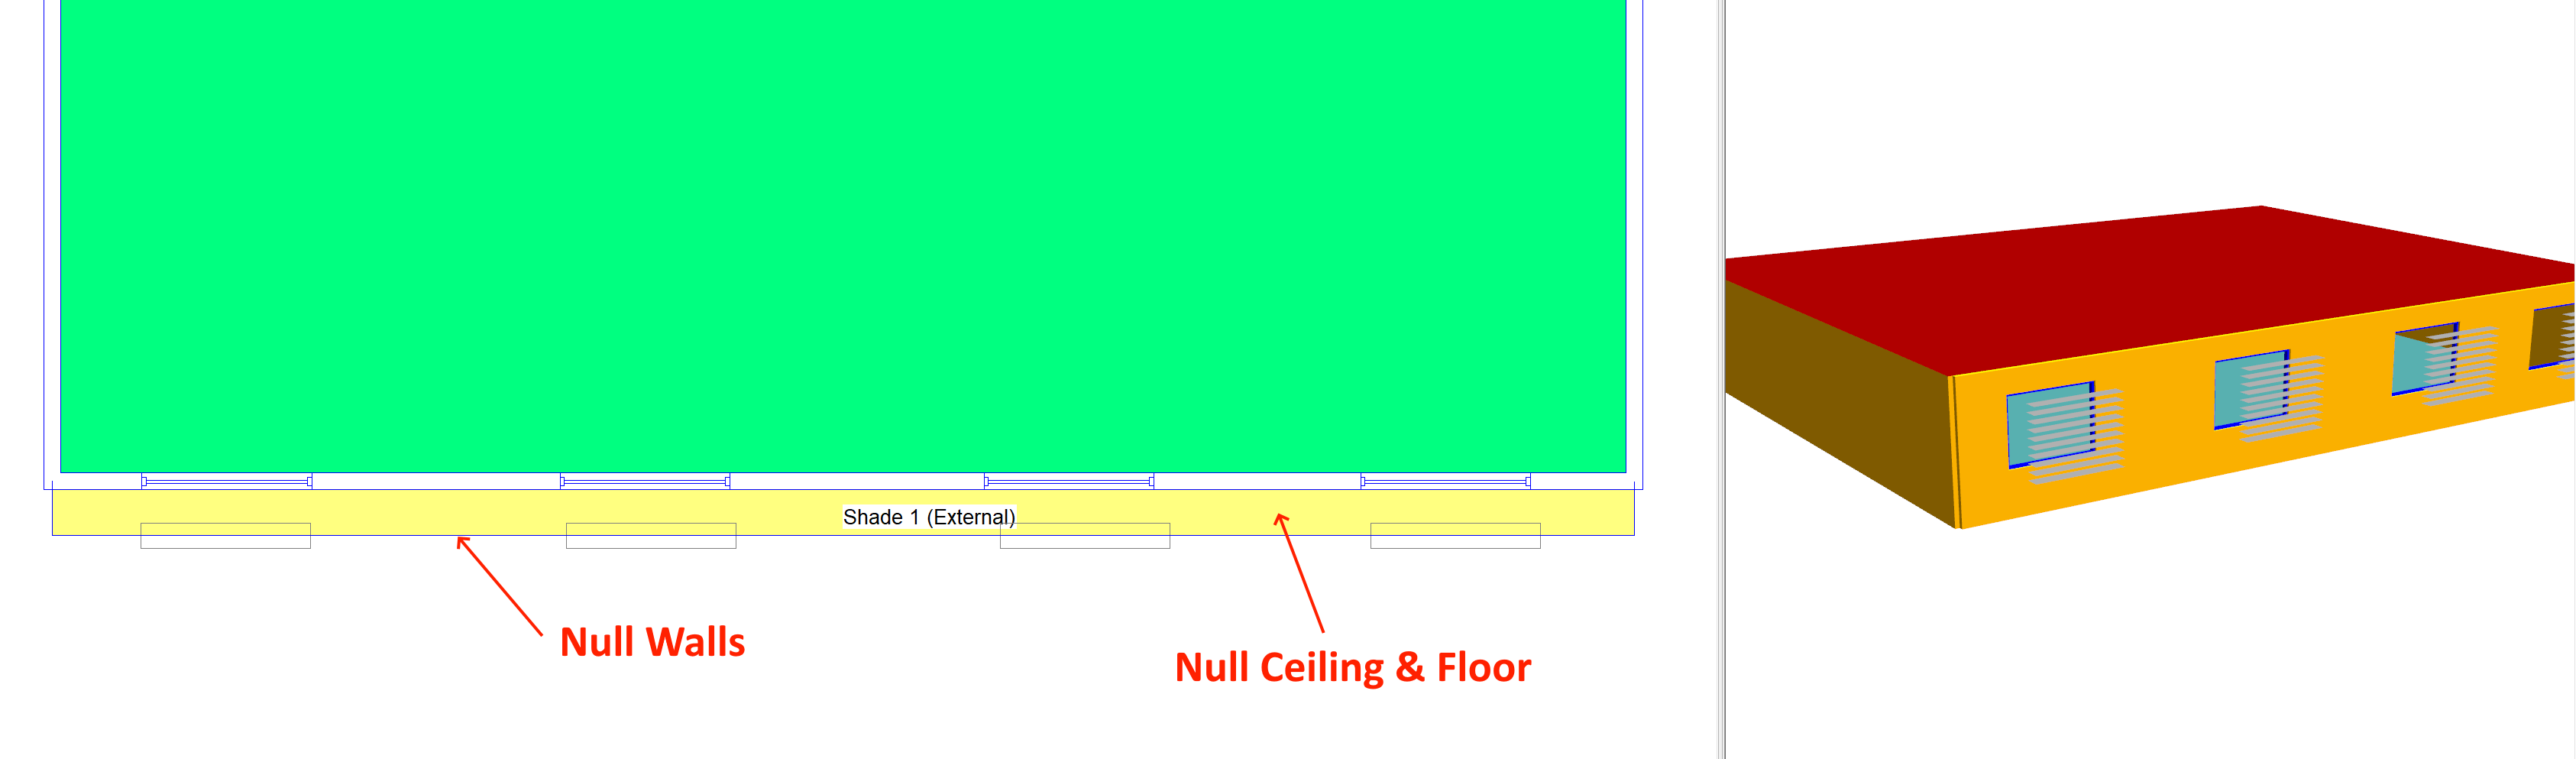
The shade zones have null walls, floors and ceilings so are open to the outside.
If you fail to check the External checkbox, the 3D modeller will assume it is a mistake and you’ll get several warnings/errors.
Warning
External zones should be used for modelling external shades only, and shouldn’t be used to analyse the external temperature of outside spaces.
Tags
Tags are another way of organising zones. If you check the Create Zone Groups for Tags option on the Generate Building Export dialog, a zone group will be created with the name of each tag containing those zones.
Tags can be used to more easily assign HVAC systems, lighting controls, and internal conditions in the Building Simulator and Regulations Studios (UK Building Regs and ASHRAE 90.1 Studios).
A zone can have any number of tags.
Tags can be filtered in the Create Zones dialog:

Tags can also be assigned in a 2D plan view. You do this by right-clicking in the 2D plan view after selecting the space(s) with assigned zones(s) that you want to tag.
Colours
Zone colours are completely arbitrary in the 3D modeller. You can use them to visually group similar zones, for example by applying a variation of a colour/ or a set colour to each zone set:
Assigning Zones
Zones can be assigned in a 2D plan view using the Set Zone tool in the Set panel of the Model ribbon:

Whichever zone is selected in the Zones Workspace Panel will be applied to the space that you click with this tool selected.
If you hold alt on the keyboard while clicking on spaces with the set zone tool, the 3D modeller will automatically advance the zone that is selected in the zones panel:
If you need to reset the Zone Set colours, simply return to Zones in the Create/Edit panel. If you keep using the Set Zone tool on a space that already has a zone, the position of the zone label will move:
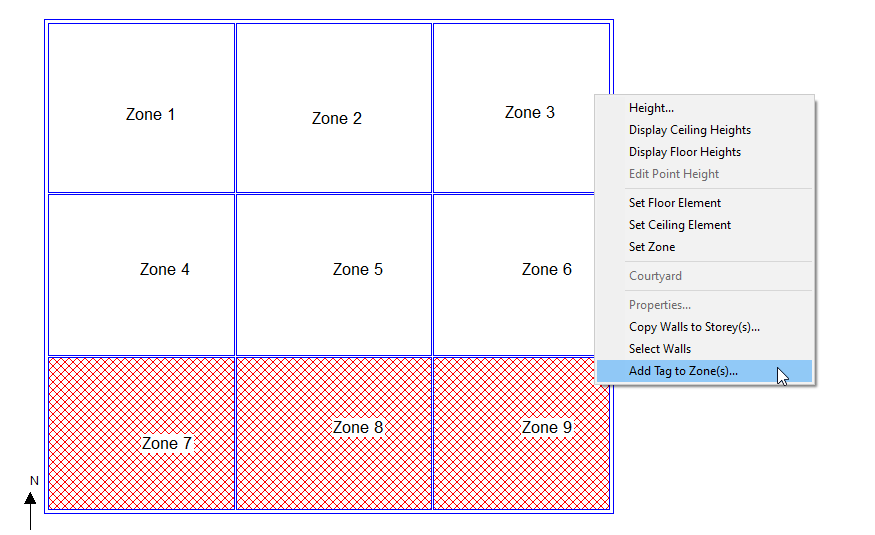
Assigning Tags
Tags can be assigned in the 2D plan view using the Select Space tool.
Select the space(s) with zones you want to tag, right click in the 2D plan view and select Add Tag to Zone(s):
Zoning Rules
The way in which you zone a building will vary slightly depending on the type of analysis you are performing.
Warning
If you are using the software for building regulations such as L2a or 90.1, please be aware the regulations have their own specific zoning rules that should be followed.
Generally speaking, spaces should have their own zones applied if:
They are serviced by different HVAC systems
They have different internal conditions (occupancy, lighting, thermostat etc..)
They have different access to daylight (windows, rooflights)
It is therefore generally a good idea to assign each space its own unique zone. If two different spaces are assigned the same zone, it is assumed air can mix freely between these spaces even if they’re on opposite sides of the building!
When modelling large spaces such as halls and circulation spaces, you should sub-divide these spaces into a number of smaller spaces with unique zones in order to capture the thermal properties more accurately:
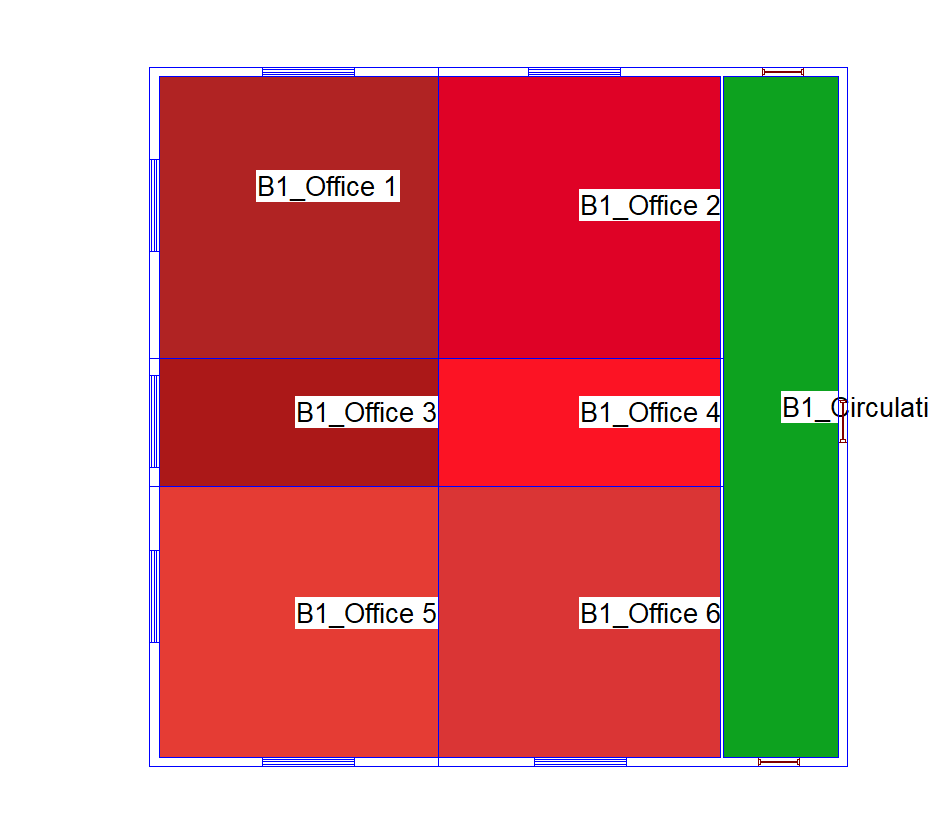
The office space above has been sub-divided into 6 zones, as each is expected to have different access to daylight/ solar.
Atrium Zoning
When modelling atria and double height spaces, assigning a unique zone to each vertical space will allow you to model the stack effect accurately and temperature stratification:
Please note that for part L2a and EPCs, you must not assign a unique zone to each vertical space when modelling double height spaces and atria.
Perimeter Zoning
For Part L2a and EPCs, any space that has a window in an external wall should be no larger than 6m deep. This is because these spaces will have good access to daylight so should benefit from daylight linked controls more favourably than those spaces further away from the lit facade.
ASHRAE Standard 90.1 and therefore LEED Energy & Atmosphere Credit 1 (EAc1) requires perimeter zoning of 15ft. A typical perimeter zone depth is 12-15 feet (4-5 m).
As Tas tracks daylight beyond the initial perimeter zone so it is possible for you to calculate the daylight factors for lighting controls for those spaces to analyse any potential benefits.
Voids & Risers
Voids and risers such as lift shafts can be left unzoned. This will have the effect that no heat is transferred into and out of these spaces. This is useful when the internal conditions within the risers are unknown.
For the purposes of UK building regulations, they can also be assigned the unoccupied and unconditioned internal condition.
Adiabatic Links
If a zone is adjacent to an unzoned space, there is no energy exchange between the those spaces:
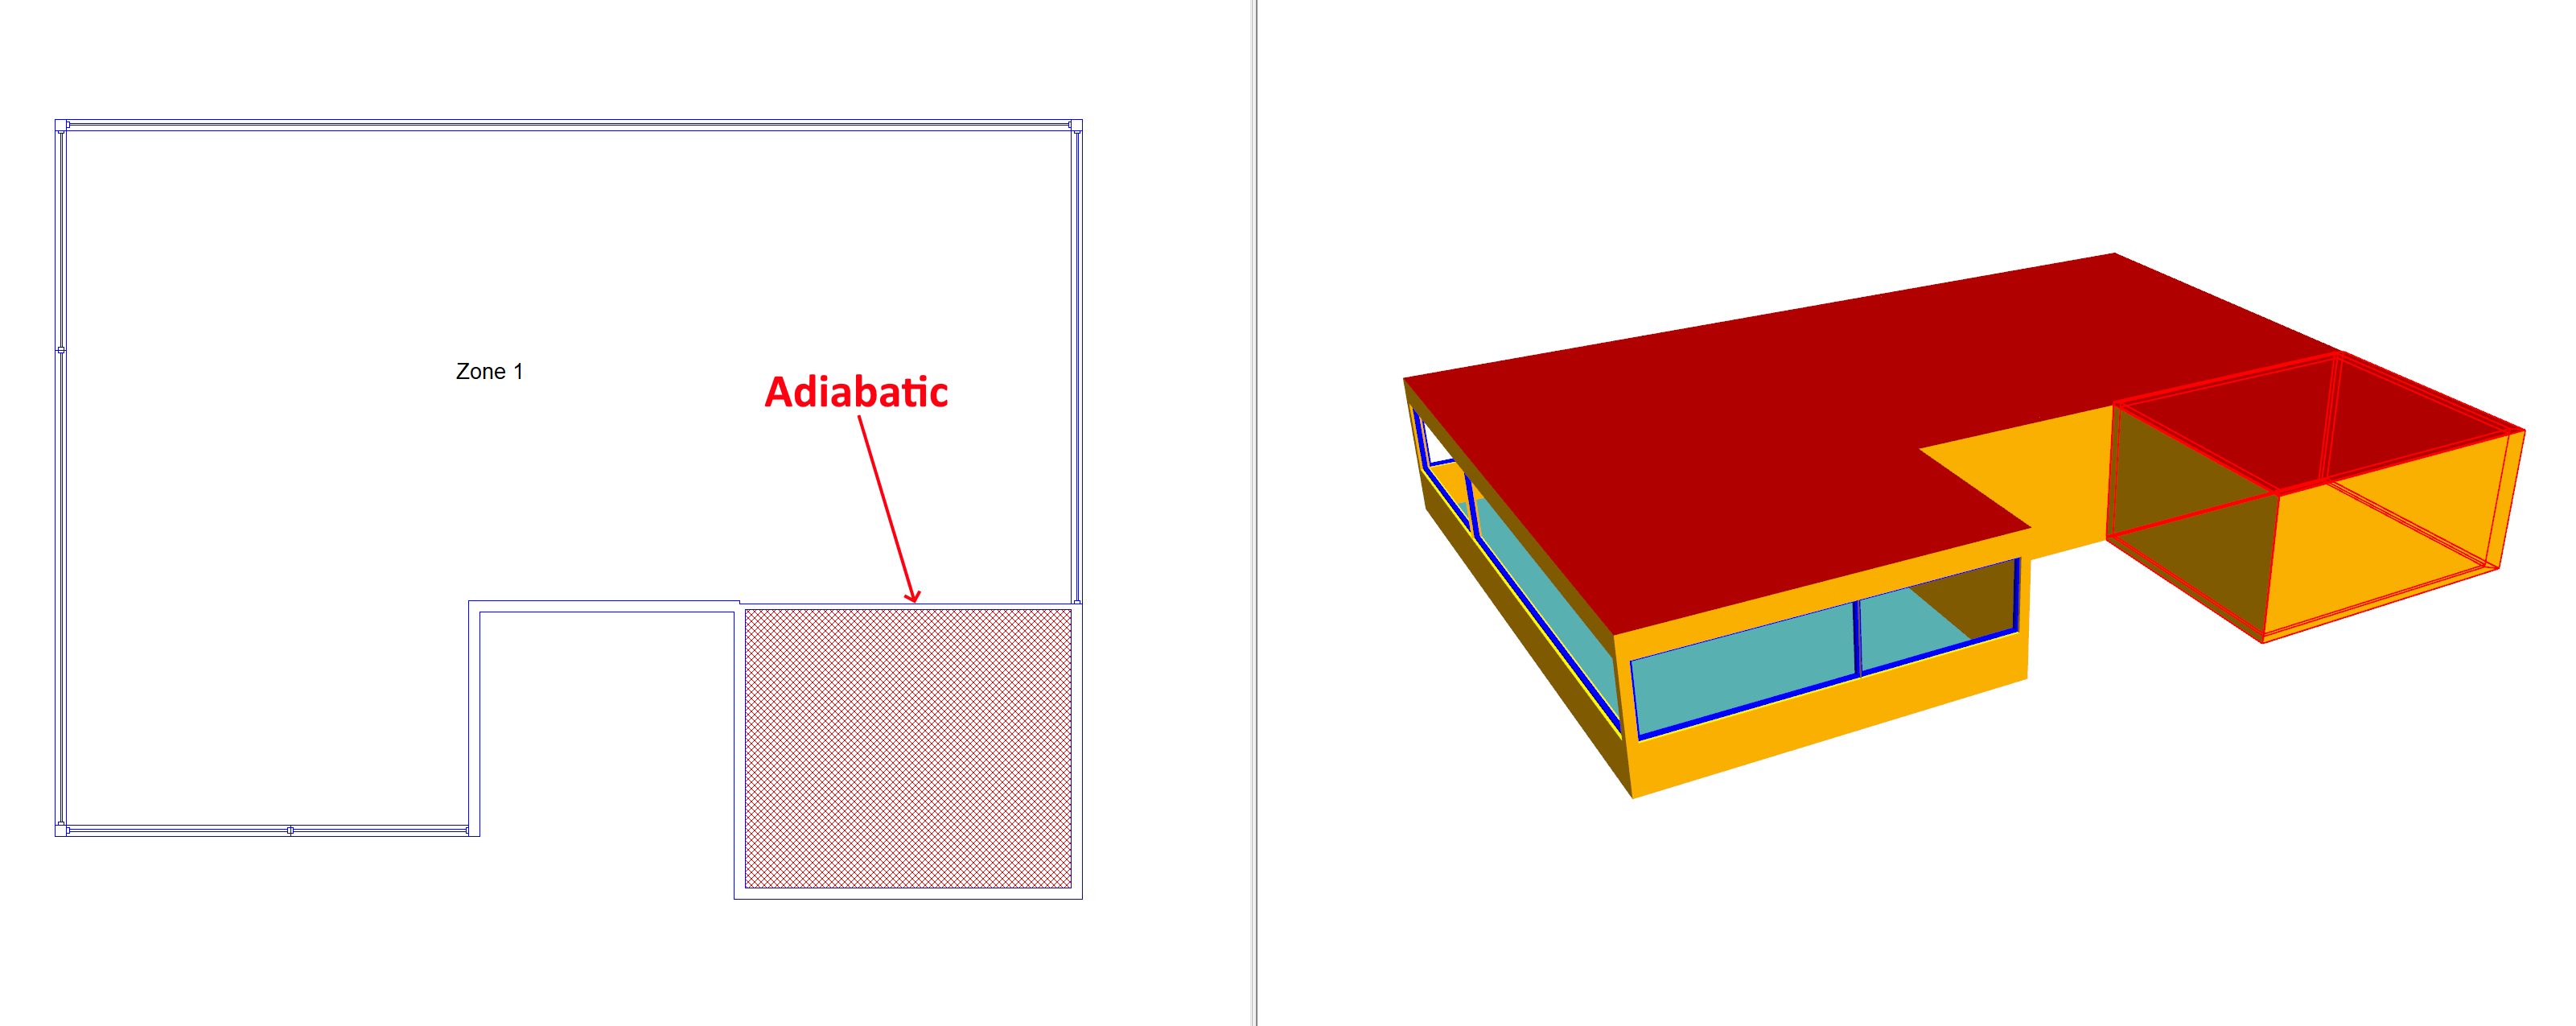
This is often referred to as an adiabatic link, and is useful when you wish to exclude the effect of a space from a model.
If the unzoned space is below or above a zoned space, no heat is transferred through the floor/ceiling elements.
The thermal mass of the construction applied to the building element in the zone adjacent to an unzoned space is still taken into consideration; for more details, see Thermal Mass in the Building Simulator manual.
Multiplicity
In the UK Building Regulations Studios, a zone can be assigned a multiplicity. This is a way of accounting for multiple occurrences of a space that is, from an energy perspective, identical to another space.
To be thermally identical, the spaces should have the same:
Internal air volumes
Facade areas & directions
HVAC systems
Internal conditions
Links to other spaces
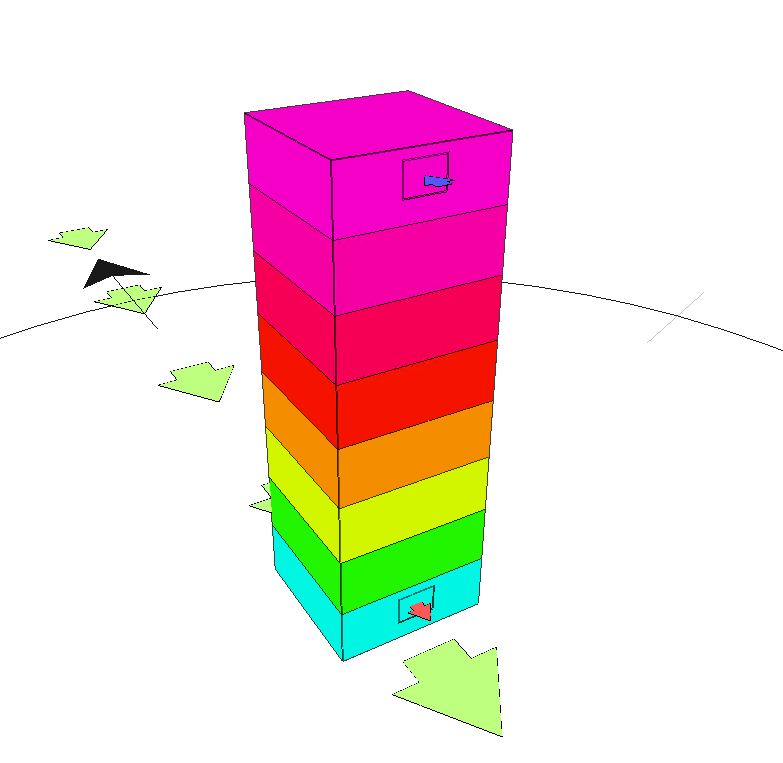
A good example is a high rise building, where a number of floor plans are identical:
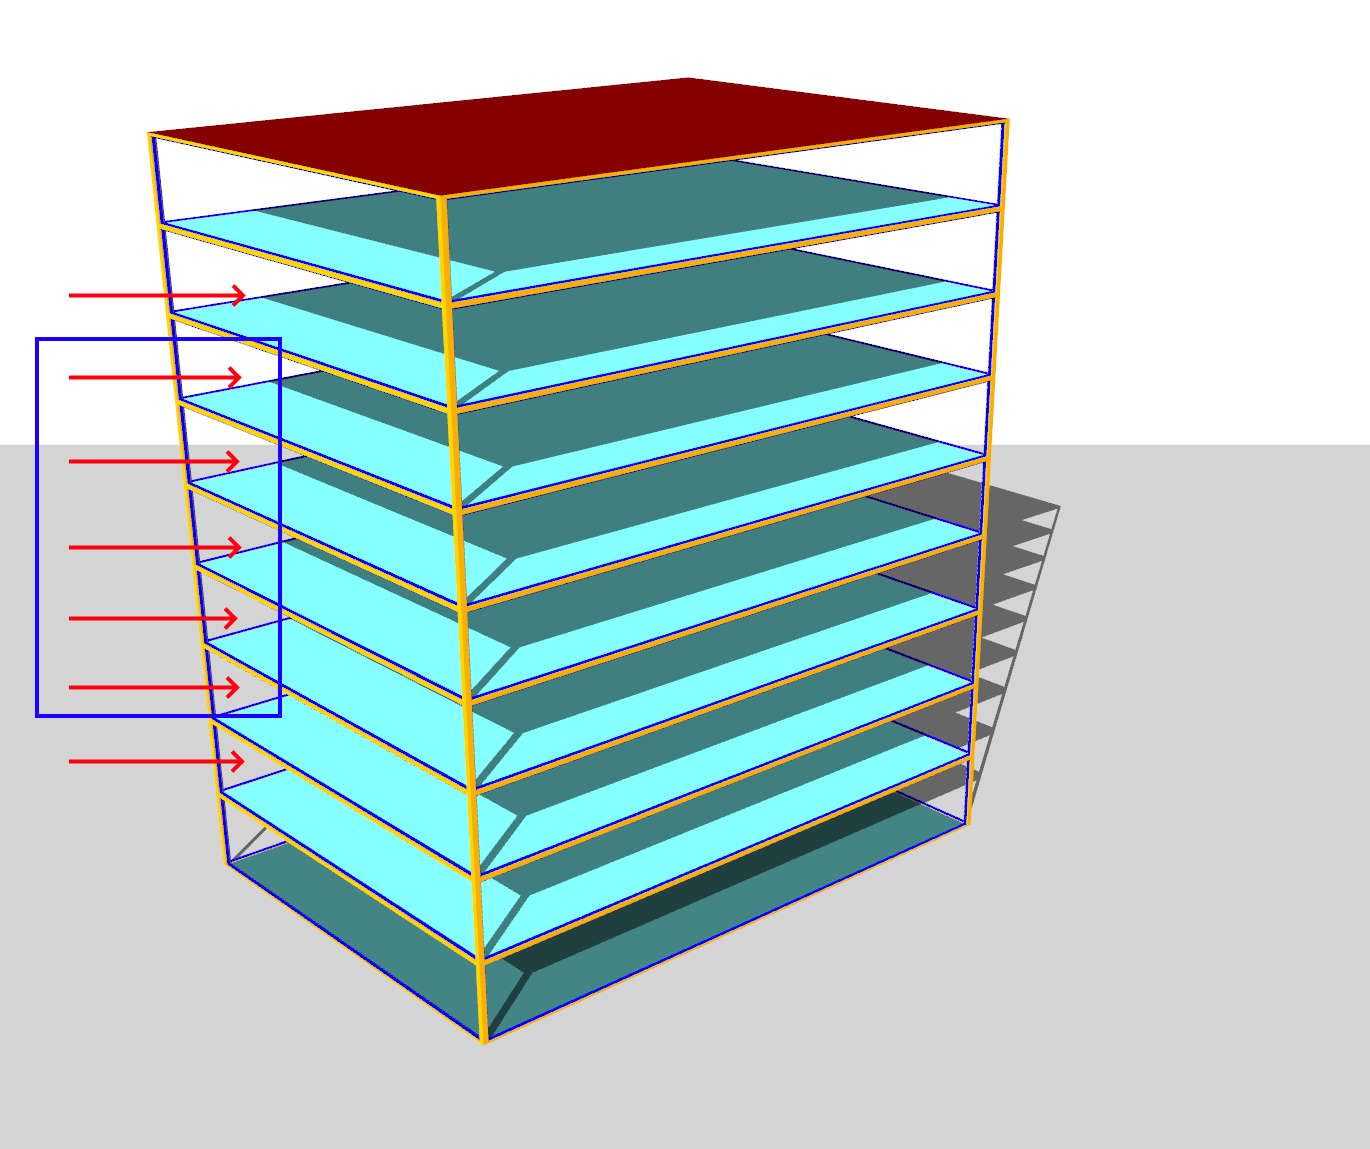
The storeys indicated with the blue box are thermally identical to each other.
The other two storeys indicated storeys are very similar but not completely identical, because they are adjacent to zones which have an exposed roof/ground.
Using multiplicity results in faster simulations.